- Articulate Network:
- E-Learning Community
- E-Learning Blogs
- Articulate.com
The Rapid E-Learning Blog
Practical, real-world tips for e-learning success.
Word of Mouth: The Articulate Blog
The inside scoop for Articulate news and product updates.
Community Blogs
Get the scoop directly from e-learning's heroes.

How to Organize & Manage Your E-Learning Course Files

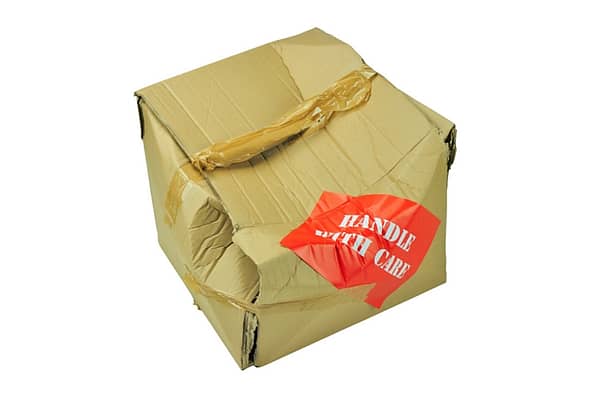
I was on the phone with someone who had problems with her elearning course. It seemed that nothing was working right. As I dug a little deeper, it turned out that she was deleting some of her files. She told me she did so to keep her files organized. Apparently the folders were looking a bit messy. What she didn’t realize was that all of those files she was moving and deleting actually broke her course.
My advice to her was to leave the published folders alone. In addition, we had a great conversation about file management in general. And I shared with her a few ideas so that she didn’t feel like her folders were disorganized.
Part of what I shared was that there are many ways to organize your folders and manage the elearning content. It all depends on your personal work preference, what you need to do with the files, and if you share your work with others.
Create Separate Master Folders
I like to start with a project folder that has all of my notes, resources, and production files. For example, the folder includes all PowerPoint, Quizmaker, and Engage files. I also include all of the original material from my subject matter experts.
However, I like to keep the assets (like videos and images) in separate master folders. The master folders hold all of the assets regardless of the projects they belong to. I do the same for my published courses. I like to have all of my assets and published courses in master folders so it’s easy for me to find them.

I do this because I do a lot of product and course demos. I need quick access to course assets and the published output. I don’t work with my production folders as frequently. I also don’t share my files much, so this workflow works fine for me.
But what works for me, probably doesn’t work for most people. So here’s another idea.
Keep All of the Files Together
This next approach is one that probably works best for most people. Create a single folder for each project. And inside that folder, place all of the files needed for your course. This includes your assets and published output.

With this approach, everything’s in one place, making it easy to manage and share files. In addition, products like Picasa and Windows Live Gallery allow you to tag and search for the media assets on your computer. You can also tag files in Windows Explorer. So my goal of keeping similar assets in a master folder is no longer relevant. I can just tag the assets and do a search of the tags.
Create a Generic Folder Structure
Regardless of the approach you use, it’s important to be consistent. This is especially true if you share your files with others. In fact, in a recent team meeting with the Articulate community team, we had a conversation about how we want to manage our production folders going forward since we share our files.

We opted for the all-in-one option above because it’s easier to manage and share files. We also decided on using a generic folder structure like the image above. We start with a pre-built folder structure that includes all of the key folders. When we start a project, we copy the generic folder structure, rename it, and then add our project files.
Using a consistent process means that as we collaborate and share files, we’ll always know where things are. Below is a quick tutorial that walks through the basic process we’ll be using.

Click here to view the elearning demo .
If you want additional ideas, check out Kevin Thorn’s post where he shares six tips for managing elearning courses . He covers how he manages his elearning courses and includes a quick tutorial .
Keep in mind that there’s not a right or wrong way to manage your course files. So you have the freedom to do what’s best for you. However, there are things you want to consider.
The main thing is who else gets to see and work with your files? If it’s just you, then whatever works for you is probably fine. But if you make the files available to others, then you need to consider a workflow that has more universal appeal. Not everyone can bear with our idiosyncrasies. Personally, I like a simple structure that’s not so rigid that I spend more time managing workflow than building courses.
How do you structure your folders and files? Do you have a generic folder structure to start? Share your thoughts and any tips by clicking on the comments link .
- Everyday . Check out the weekly training webinars to learn more about Rise , Storyline , and instructional design .
Free E-Learning Resources
| Want to learn more? Check out and free resources in the community. | Here’s a for e-learning, instructional design, and training jobs | Participate in the weekly to sharpen your skills |
| Get your and . | Lots of cool to check out and find inspiration. | Getting Started? This and the will help. |
You might also like:
38 responses to “How to Organize & Manage Your E-Learning Course Files”
August 31st, 2010
Good advice! I always keep a back up too. An external drive and/or on a shared drive.
heh. I start with the very best of intentions. The first week of working on something has all the images in one folder, all the templates in another, videos/ animations in another. But then there will come the point where I just quickly want to test something. And I don’t realise I can create a test folder to test things in. So a bunch of files that have nothing to do with the project get mixed in with everything else. The basic structure is always retained, but figuring out what is *real* and what was just a test has caused me problems in the past. It’s something I’m trying to cure 🙂
Sean Bengry
Excellent advice, especially with not only the development and storage of Articulate objects, but with re-use and sharing as well.
Naming of these files (and folders) is also a very strong factor. Your team should determine a naming convention early on for development versions and files of all type.
Each of those considerations play a vital part (especially with Articulate dev files such as QUIZ, PPTA, PPTX, INTR) in where to put and what to name your “in development” files.
This is really critical to efficiency of work, but it’s more critical to sustainment and maintenance after you’re done.
The only thing I’d add are:
Some rules against pollution. Invariably things will show up where they aren’t supposed to. For example, within your source materials, you might see Flash FLA’s. Some folks will simply publish into that same folder and harvest for import into the assembly tools (Lectora, Articulate, etc.) This creates a problem with potential version conflicts.
We set up publish paths to go directly into the assembly product if at all possible (in Lectora that’s into the Extern or Images folder). This saves the harvesting step and reduces the possibility of version confusion and clutter.
I love the simplicity of your structure. Simple is better. We segregate folders a bit more to help work structures for larger teams. Here’s what I use:
– Planning //Storyboards and other planning artifacts – Production —- Prep //Raw stuff comes in here —- Source ——- Flash ——- PhotoShop ——- Lectora
I think we could easily adopt a setup similar to yours. There are plenty of advantages to a simpler structure.
We publish directly to a Web folder for review, so each publish is live for testing and review. Once finished it’s archived into the final_product folder and tucked away in our delivered archive.
I use a version control system when I’m doing this stuff on my own. I’m used to SVN, which is easy to setup. The advantage is incremental capture of who-changed-what-when and the ability to both roll back to a change and pull down your entire archive wherever you are, even if your development machine catches fire or walks away. SVN also operates on a binary change transfer. Meaning if your PPT only changed by 15kb, that’s the amount that’s going across the wire to your SVN host.
SVN hosts can be had for between $4 / month and $20 / month with plenty of capability. GIT is another popular option. There are others. These are a godsend once you get used to the workflow (add, commit, update).
This is such good advice, Tom. I learned about consistent file structure the hard way a few years ago… I kept re-publishing but my changes weren’t appearing in the final course! You can only imagine the frustration. Lo and behold I finally realized that I was uploading one published file but had been overwriting a different one all along. whoops! Solid organization principles went into effect that day!
A consistent file structure makes replication of similar courses much easier to manage. Particularly when you are dealing with lots of assets and elements. Absolutely critical when you are working with a team but also eliminates frustration when you are a lone wolf working on lots of different projects.
Steve mentions version control in his comment above. This can be extremely important. The process used to version control should be documented. In a company that I worked for previously, we had several situations that came up, most notably with safety training, where we needed to be able to provide the exact version of a course that was in existence in the LMS at the time an employee took it. If an employee gets hurt and sues the company, your company attorneys may look to you to provide proof that the safety training was appropriate. Another employee sued the company after termination stating that she was not trained properly in her job (not safety related). If you have a situation like this and you can provide the employee’s training record and the exact version of training that she completed, your company attorneys will be your biggest fans.
Ed Springer
Great tips! Sometimes we can get caught up in developing content that we get a bit disorganized. Having a consistent structure for storing files seems essential to good work habits and quality product. Thanks Tom.
Kevin Thorn
Great advice as always Tom! And thanks for the nod!
I am passionate about this topic (almost OCD) and in my view should be mandatory in the Intsructional Design programs in universities. In fact, I’m presenting at the University of Memphis Instructional Technologies Graduate program for both semesters this year. Organizing and planning a structure is a crucial step and one I urge everyone in this buisness to develop a habit before the first document is opened.
I didn’t mention tagging in my article, but a practice I have perfected over the last several months. With the sevices you mentioned in Picasa and Windows Live Gallery, it really helps with image management. I use Adobe Bridge locally, though.
Naming conventions are key as well so files/folders line up alphabetically. Also, a simple “_v2”, “_v3”, etc. at the end of file names along with mod dates keeps everything in a neat order.
Through the Articulate Guru project I must thank the Articualte team as I ended up discovering newer methods that I added to my process…and intend on writing an article or two about it.
Christine O'Malley
Thanks for the post Tom,
I would like to chime in with a couple of comments:
Regardless of which tool you use to create your e-Learning this is a very important practice. After a while of doing this you realize how important it really is to keep things in order.
When a project starts, we set up our folders right away with a consistent naming structure; that’s important because it makes it so much easier to know where to save and find different types of files.
One thing I do for every course I develop is have an IMAGES & ARTWORK folder. The ‘artwork’ part of this folder contains a PPT file… as we all know, PPT is wonderful. There isn’t a single project I work on that does not include some sort of art work that I develop in PPT. For example, some nice drop-shadow buttons (etc). I keep this ‘master’ file in that folder so if I ever need to edit my PPT artwork, it’s right there at my fingertips.
Happy developing!
Christine Lectora Developer
Hi, Very valuable tips which helps me to think and orgainize my work in systamitic way. Thanks you very much.
Ira Wessler
This seems a little rudimentary to me…
I’m shocked that basic file management is getting kudos–where have you been the last 20 years?
Thanks for the great post! Any ideas on how to manage the numerous pdf files…Any advice on pdf managers…something that is able to take the DOI and metadata from the journal’s pdf download also and free also:) I develop a lot of e-learning content based on my readings of journal articles…and I am having a terrible time managing my pdf treasure:)
How to Organize Your e-Learning Project Files | Jenise Cook
[…] or course files? The e-learning community often talks about files and project management. In fact, Tom Kuhlmann of Articulate has a new blog post today that can spark new ideas. Click the image below to learn more from […]
Jenise Cook
It looks like we use a similar system.
I just wrote a blog post on how I organize and manage my e-learning client files. (I wanted to do that after Kevin’s Forum thread, and just now got around to it.)
The file management structure I use comes from my web design days some time ago. I’ve been using it since the late 1990s, early 2000.
To learn more, visit:
http://ridgeviewmedia.com/blog/2010/08/how-to-organize-your-e-learning-project-files/
@jeff Yes! Always back up. I back up to both a flash drive and a huge 1TB external drive
@steve I put my “source” files (FLAs, layered PNGs or JPGs, etc.) inside the main asset folder (the SWF folder, the IMG folder…). I put them into a “source” subfolder within that main asset folder. But, I like your idea. As Tom says, we need to do what works for us and our teams.
@kelley I’ve been in your situation before. What we did, to play it very, very safe, was we put the date and time published into the PPT file name. In some cases, it’s better to do that to the name of the main project folder, and then archive it. Do a copy and paste of the project files and add the new/current date to revise an older project.
@Kevin Instead of using v2, v3, etc., because those tags became meaningless after awhile, we continued with adding the date and time published to the file name: Your_401k_08312010_0900am That helped Legal and Compliance departments to have a sense of comfort.
@Ira: it is somewhat rudimentary, but something I run into quite a bit. Tthere are many people who are just getting started with media development. In the past they may have only shared a Word doc here or there. But they’ve not had to manage media projects with all of the different assets. Or, they have their own way of doing things and now have to change how they manage files because it impacts others.
Another important factor is that with many e-Learning tools an “image” folder is automatically created for you, this is especially true if you happen to use Lectora. I make sure that I create a folder called “my_own_images” (I always adhere to the lower-case/underscore naming convention) that way I can undoubtably tell the difference between my own assetts and not confuse them with the one’s that are embedded or published with the course.
Organization is key for all of the reasons supplied by the users above. I do use a structure template, simplified for LMS uploads and versioning. Our Main Course Folder is housed on a shared/backed up drive, and I’m experimenting with the Captivate Reviewer and pushing those files out on our SharePoint site for Review/Tracking. Anyone doing this currently?
Main Course Folder – LMS Upload (all the files needed for LMS integration, swfs, SCORM package, etc. – This is always the current version of the course…when updated, previous version is still captured in the Published Items folder) – Working Files (PPT, Captivate) – Source Files (original SME stuff, images, etc.) – Published Items (swfs, html, version folders)
@ Ira…you wouldn’t believe! The issue is not so much rudimentary file management, but an acknowledgement of the way eLearning projects spiderweb out of control. A filing system that worked for a one-man shop or team of two authoring with one platform becomes cumbersome when the team increases, LMS platforms or authoring tools change. This is a great thread to see how others have managed similar file types. It’s always good to share best practices, even on something “rudimentary.”
Doug Bedinger
Just yesterday I published a course as html then tested it and found that my multiple-choice quizzes were not playing properly. It turned out that the file name was too long! From now on when publishing I’ll make sure to publish to a folder that is closer to the root directory on my computer, rather than buried deep down within my data file structure.
A resource management and version control is great challenge for any multimedia project, especially for larger projects and team collaboration.
As mentioned, folder and file naming is important. I’ve found that file_v1, v2 etc nomenclature holds less relevance than file_YYMMDD. At a glance you get a meaningful statement of the version. Don’t forget the importance of setting up an Archive folder at various levels- move older file versions here to keep active folders tidy. Also easier when you may need to condense/delete/HSM archive for conservation of network drive space. (HSM: hierachical/hegemonic storage management.)
As mentioned, content currency can be crucial for some courses and there may be legislative/legal implications. Setting content build and review dates into documents can be useful (only if you do actually then review!) I’ve worked with publishing systems that enforce review dates, look forward to LMS systems that support this better also. Version control becomes crucial here and, if resources allow, using collaborative workspace technologies (such as Quickr or SharePoint) can assist with group projects and resource management.
Andy Petroski
Naming conventions based on the storyboard screen is another great way to manage assets . . . especially for updates. So, storyboard code = 211 . . . then assets named 211_1.jpg, 211_2.jpg, 211_1.wav, etc, etc.
I’ve found this invaluable when creating, processing and organizing assets. It’ especially important when working in a team environment where the designer needs to pass assets back-and-forth with the developer.
It’s all based on the storyboards though . . . shame on you if you’re not creating some sort of storyboard and storyboard naming/numbering as part of your design process. 😎
September 1st, 2010
@Doug: good tip; I’ve run into that transferring files, as well.
David Anderson
@Andy – good point about using the storyboard for naming conventions. I’ve worked on projects where every image had to be identified in the storyboard.
We have an example storyboard in our community forums: http://www.articulate.com/forums/articulate-presenter/17857-new-studio-09_need-storyboard-examples.html
Most often I see that type of board in design models where the ID passes the boards on to another designer or developer.
Tracy Parish
Thanks Tom. I had seen your screen before at a demo booth and was impressed by how much was there, yet how organized you were and could locate anything in an instant. I have started creating files similar to this, but the description here in this posting will help me to become more organized as well.
Lauren Milstid
Doug, I agree. I stopped publishing to my root folder and now publish outside of my main project folder. So, I now work in 2 folders, titled:
1. Articulate Projects (this includes subfolders with all of my support files)
2. Articulate Published Projects (this includes only my published course)
Abby Crowley
September 2nd, 2010
Tom: How did you get the check marks to “check” in the demo. What entrance animation is that?
@Abby – those are annotations and they’re part of Presenter ’09.
Here’s a post on using them: http://www.articulate.com/blog/use-annotations-to-save-time-look-like-a-star/
And a few screencasts on using Annotations:
1. Save time with annotations in Articulate Presenter rather building animations in PowerPoint: http://screenr.com/SWN
2. How to narrate & annotate an Articulate Presenter slide, all at the same time: http://screenr.com/pJU
3. How to add multiple annotations to your presentation slides: http://screenr.com/1fC
September 4th, 2010
I had a couple of thoughts: – @Ira – Sometimes things have to be relearned as new people and new platforms come into play. Old (30 years ago) MVS systems had security and configuration management built into the tools. When PCs came into being chaos ruled until people rediscovered that they still needed the things taken for granted. Same is true for different tools. – In addition to different versions of project files (configuration management) also keep in mind disaster recovery. What happens if/when the drive crashes or someone accidentally deletes the entire project. Sometimes this is done by systems software but it’s good to know what it is for when that day comes.
September 8th, 2010
Great idea thank you for sharing
Tutoring Match
September 9th, 2010
Great points, so critical to keep yourself organized with any type of learning, in order for your to be efficient and for it to be effective. Keep a back up!!!
David Becker
September 12th, 2010
I like folder structure based on workflow such as: 1. Proposals and contracts 2. Client source files 3. Storyboards 4. Interface design 5. Media development 6. Authoring 7. Published files 8. Maintenance
I find this helps when working with others and also maps pretty closely with the different roles, so sales people play in the first folder, graphic designers and flash dev play in folders 4 and 5, and ID’ers in folder 3 and so on.
September 13th, 2010
My folders look pretty much like yours Tom. Thanks for the tips though.
September 27th, 2010
Great tips Tom, this is very important for us in Grad School. Keeping everything organized is very essential. There are a few tips I picked up from this article that I’d like to start applying for my classes. We work on many projects throughout the semester and keeping the files in a consistent order can make or break your project. I’ve started using Google Docs as a backup for files. It’s free and allows me to access them anywhere.
Chris Fletcher
October 5th, 2010
I organise my files with a seperate folder for engage and quizmaker files (called Interactions) one for any flash/captivate files I include (Flash) one for images (images) and then a folder called published where I put the published folders. The presentation file (ppt) sits in the main folder for that project.
I found very early on that if you dont organise your folders, things get lost easily. I adopted this style across customer service training when I worked at O2UK, and do it still in my new job. I find its easier for me to know what I’ve done, and easier if someone else from the team comes along to edit things later.
I even created a folder structure and saved it in our base eLearning folder so all anyone needs to do is copy that folder, rename it and save the new presentation to it.
7 Simple Rapid E-Learning Tips & Free PowerPoint Template » The Rapid eLearning Blog
[…] default folder and this way all of my projects are structured the same way. I wrote a post on how to organize and manage your project files. That may […]
Suzanne Tofalo
In your tutorial, what did you use to be able to show your screen live as you narrated? Is that Screenr?
@Suzanne: yes those inserted screencasts are Screenr videos that I downloaded and inserted into the slide.
7 semplici tips sul rapid elearning e un template PowerPoint gratis «
October 22nd, 2010
[…] e in questo modo tutti i miei progetti sono strutturati allo stesso modo. Ho scritto un post su come organizzare e gestire i file del progetto. Questo può […]
Tutoriels | Pearltrees
May 16th, 2012
[…] How to Organize & Manage Your E-Learning Course Files Word of Mouth Blog – 20 Tips to Help You Get a Handle on Building Better E-learning Once again, it was another big week of e-learning goodness in the Articulate community. Articulate Storyline launched two weeks ago and already the Articulate community is sharing ideas, source files and tutorials for learning Storyline. If you haven’t already downloaded the free trial , now’s a good time! A Dozen Handpicked E-Learning Resources It’s hard to believe that we’re approaching the last quarter of 2010. A Simple Roadmap to Better Rapid E-Learning I get a lot of questions about how to get started with building e-learning courses. I’ve covered that a bit in previous posts on why you need to create a portfolio and simple ways to get started . I’m also a big advocate of participating in your learning community to build relationships and improve your skills . Contrast is a key part of your course design. In fact, it’s one of the foundational principles in visual design. Many people know the acronym, CRAP (or CARP if you’re an ichthyolatrist) which stands for: contrast, repetition, alignment, and proximity. […]
- Rapid E-Learning 101
- Designing the Right Course
- Instructional Design
- Building Scenarios for E-Learning
- Managing E-Learning Projects
- PowerPoint for E-Learning
- Visual & Graphic Design
- Audio & Video Tips

Subscribe to get the latest tips plus this free 63-page e-book.

It is hosted by Tom Kuhlmann who has over 20 years of hands-on experience in the training industry and currently runs the community at Articulate.
- Johanna on 7 Ideas to Help Make an Online Course Less Boring
- Tom Kuhlmann on How to Quickly Create Illustrated Characters with AI
- Jeniffer Brubaker on How to Quickly Create Illustrated Characters with AI
- Skip to primary navigation
- Skip to main content
- Skip to footer
Teaching in Higher Ed
How to keep course files organized
By Bonni Stachowiak | December 16, 2014 | Leave a Comment | Array Twitter Facebook LinkedIn Email
I never realized that I was “different” until my friend showed such an interest in how I organized my files and folders for my academic life.

My Mom was always a person with a fond appreciation for file cabinets and keeping articles of interest around various topics. She definitely passed that on to me.
Now, neither of us wants that many physical files cluttering up our home. However, since storage space on our hard drives and/or in the cloud is relatively inexpensive toda y, it makes sense to hang on to stuff, in case it winds up being useful in the future.
The search features on computers today are so robust, that you could argue that having a good folder structure is no longer necessary. Some time ago, I trimmed the number of folders in my email program, so that I didn't have to scroll through so many when I was looking for something via my iPhone.
However, I still find it helpful to have a basic system of folders on both email and on my hard drive to accommodate those times when search doesn't get me what I need.
Keep course files organized
In any given semester, there are two main directories (folders) that I spend most of my digital time in:
1) Semester-specific folder
This folder contains data related to a specific semester. For 2015s, I have my class rosters (which are also sign-in sheets), my schedule (which gets printed and hung up outside my office), and a folder for students' work in each of my classes that semester.

In addition to the schedule that hangs on my wall, I create my version of Michael Hyatt's ideal week template . This exercise enables me to see how I want to invest my time throughout the semester and identify any barriers, in advance.
I spoke about how I use the ideal week template on episode 23 of the Teaching in Higher Ed podcast .
Inside each of the semester-class folders will be the students' work, as the semester gets under way.
As I begin a new semester, I move the previous semester's folder into a directory named z-Archive. The naming convention on that folder allows for it to be listed at the bottom of my main university folder, since I don't need to access it often.
I use Dropbox for almost all my files now. They now offer 1 terabyte of data on their pro plan , so it makes good sense to invest in the service. I appreciate how I can create a link to a file with a right mouse click and choosing “share dropbox link.”
When you move a folder (to an archive folder, for example), any links that you provided to students for feedback are then broken. That's why I wait until a few weeks into a new semester prior to moving/archiving the folder.
2) Course content folder
This folder has directories for each of the classes I have taught previously. The PowerPoints, exams, and other class resources are kept in the folders. The publisher materials also go here, though I tend not to keep archives, since much of the information is redundant and some of the files are quite large.

Within the 1-courses folder is also a folder called z-Class ideas. This has course descriptions for electives that I have proposed previously, as well as class resources for courses that I was potentially going to teach down the road and needed a place to hang on to such materials.
When people have asked me for guidance on file organization in the past, they have often shown me their current structure (or lack of it). It is hard for me not to turn in to a major back-seat driver in these cases, as they often show themselves to be working far harder than they need to…
Here are a few other suggestions for keeping your class resources organized:
Use aliases or favorites
On the Mac, there's a favorites list over on the left-hand side of each finder window. I keep my most commonly used folders there, including my semester-specific and course-content folders.
On the PC, you might consider using aliases, which let you create a link that takes you to the folder, which you can then place wherever you want to have easy access.
Avoid punctuation in file names
It pains me when I see a file name like: assignment.smith.final.pptx
Punctuation was never meant to be any part of a file name. While some operating systems allow for punctuation better than they previously did, it still isn't a good idea. Somewhere down the line, your file could encounter a system that doesn't like punctuation in file names and you may not necessarily catch why the error is occurring right away.
Direct students on what to name their files
It can be a big help if the students are told what to name the files that they submit for your courses. Yes, they may forget, and you will still need to tweak some of them. However, most of them will remember and it will save you that much more time in your grading process.
[reminder]What techniques do you use to keep your course files organized?[/reminder]

- Bonni Stachowiak
Bonni Stachowiak is the producer and host of the Teaching in Higher Ed podcast, which has been airing weekly since June of 2014. Bonni is the Dean of Teaching and Learning at Vanguard University of Southern California. She’s also a full Professor of Business and Management. She’s been teaching in-person, blended, and online courses throughout her entire career in higher education. Bonni and her husband, Dave, are parents to two curious kids, who regularly shape their perspectives on teaching and learning.

GET CONNECTED
Join over 4,000 educators.
Receive a free Educational Technology Essentials Guide and weekly update.
Related Blog Posts
- Professors: Start the year out organized using your iPhone
Leave a Reply Cancel reply
Your email address will not be published. Required fields are marked *
- Weekly Update
- Recommendations
- EdTech Essentials Guide
- The Productive Online Professor
- Bonni’s Favorite Podcasts
- How to Listen to Podcasts
Subscribe to Podcast
- Speaking + Workshops
- Podcast FAQs
- Lilly Conferences Partnership
- CSU Collaboration
- Get in Touch
- Support the Podcast
- Sponsorship
- Privacy Policy
University IT
- Blackboard Online Course Content
Export, Import or Copy Course Content in Blackboard
If you have developed course materials in Blackboard in a previous semester, you may want to move them into a current course by copying or exporting, then importing. This process refers to copying content from and Original course into another Original course
FYI before you begin:
If your source course is from a previous semester, you will need to find the course in its TERM on the courses page.
Both of these methods will ADD, not replace content in the destination course, so some cleanup may be required after the copy completes in order to get rid of duplicated or unwanted Course Menu items.
If you have tests and question pools in your source course, it may be best to use the export/import method . Otherwise follow the instructions below for Copying Your Course .
Exporting & Importing Your Course
Exporting Your Course
1. Click on desired Content Area from the Course Menu.
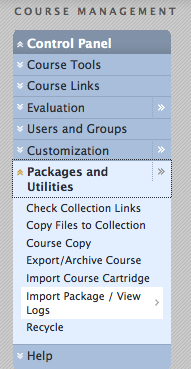
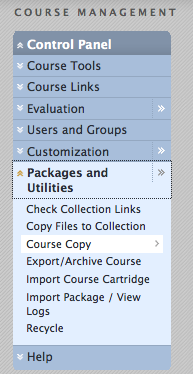
2. Under Control Panel, use the pulldown next to “Packages and Utilities” to choose Export/Archive course.
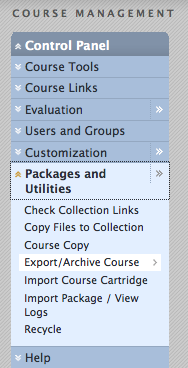
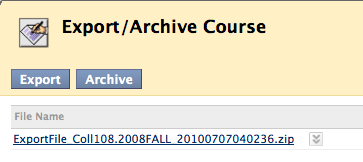
On the next screen, you will probably find that there are no existing export files. You will now create an export file by clicking the “Export” button.
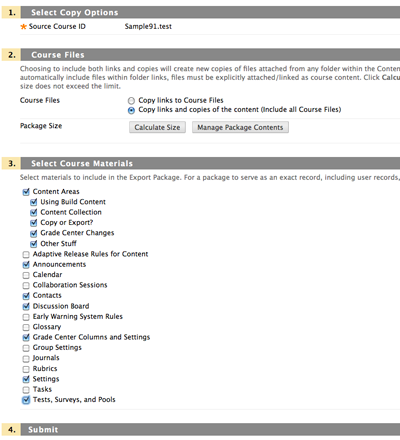
3. You will now be presented with a list of all possible Bb content and tools that might be in your course. Choose any elements that you want to copy into the destination course.
If you are copying assignments or tests, be sure to also check “Grade Center Columns and Settings” , Otherwise assignments and tests will not copy over.
** PLEASE NOTE: Note that if you copy Settings, and the source course is Available, the new course will be set to Available. If you choose Settings and you want the new course to remain unavailable, be sure to switch it back off after the copy is complete
Always be sure to select “Copy Links and copies of the content.” This should be selected by default.
4. When you’ve selected everything you want to copy, click Submit.
Blackboard will confirm your request and send you an email when the export file is complete.
5. Once you’ve received the email saying your export is complete, return to the source course, go to Packages and Utilities and choose Export/Archive course as you did in Step 2. You should now see your export file listed. Click on the hyperlinked file name to download the file.
Import Your Course
1.. To import this file, enter the course where you want to import the materials, the “destination” course.
- In this course, under the Control Panel, use the pulldown next to Packages and Utilities to choose Import Package (NOT import Course Cartridge)
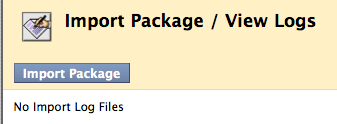
2. On the next screen, click the Import Package button
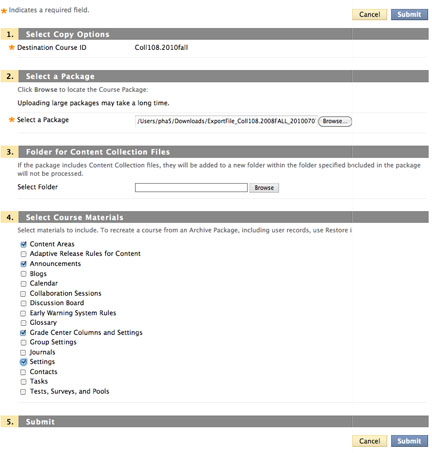
3. Navigate to the location on your local computer where you downloaded the export file from the source course and choose it.
4. Choose all the items you want to import. It is best to just choose everything as the system will only import what is in the export file.
5. Click Submit.
In a few minutes, you will get an email notifying you that the process is complete. Please note: this may or may not be the case. It frequently happens that the email arrives before the copy is done. If you go to the destination course and do not see the content, please wait another half hour or so before concluding that your copy or import has failed.
Remember that this process ADDS to the existing course. If left hand menu items have the same name, the content will be added at the bottom of the menu area.
Copying Your Course
1. Enter the original or “source” course. (Please note that you cannot copy INTO an Ultra course – this is only for copy into another Original course)
2. Under Control Panel, use the pulldown next to “Packages and Utilities” to choose Course Copy.
3. On the next screen, select “Copy Course Materials into an Existing Course.” (NB: Instructors do not have system permissions to create new courses.)
4. To select the “destination” course, click the “Browse” button. It will list all courses in which you are the instructor.
5. From the list in Item 2 on this screen, choose any elements that you want to copy into the destination course.
We recommend that you Select ALL and then Uncheck the following: Any Content areas that you do not want to copy, Announcements, Settings.
Note: If you are copying assignments or tests, be sure to also check “Grade Center Columns and Settings..” Otherwise assignments and tests will not copy over.
Please make sure that Settings is UNCHECKED.
6. Be sure “Copy links and copies of Content” is selected.
7. Do not include enrollments.

Remember that this process ADDS to the existing course. If left hand menu items have the same name, the content will be added at the bottom of the content area. All other items are added to the bottom of the menu.
Copying Courses with Panopto Content
If you use Panopto streaming media in your course and want previous videos available in the current course, you need to make copies of those videos into this semester’s course folder.
It is possible that this will happen automatically, if you perform the following steps in order.
- Perform your course copy as mentioned above. Be sure that Settings are UNCHECKED
- Immediately after the copy is complete, provision the Panopto folder by clicking on the Panopto Course Folder tool in your course (this can be accessed in the Access to Tools or similar link on the left hand menu)
If the videos do not copy automatically, you will need to do that within Panopto. Note that copies will not be immediate, it may take up to 24 hours for the videos to copy (although it is typically within 1-2 hours). See How to Batch Copy and Move Videos
If you’re not sure of the best option, or you have any questions about Panopto content in your copied course, contact your Blackboard Support Team.
Cleaning Up Integrated Tools (Voicethread, Zoom, Yellowdig, Perusall) in Your Course after a Copy/Import
If you use any of the following tools in your course, you will need to relink them in the new course.
- Voicethread
Voicethread links will need to be clicked to reassociate them with the actions in Voicethread and with your new course.
If you are using the Assignment Builder function, Voicethread will automatically make a new copy of your Voicethread for use with just your own comments. But be sure to review to make sure that any comments you made to/about students are removed.
If you are not using Assignment Builder, you may want to make copies of your existing Voicethreads prior to this in order to link the new versions in your new course. Be sure to only include your own comments so to protect the privacy of your previous students.
Make a Copy of a Voicethread
For Perusall, you will click the link to make a new Perusall course area. You can then copy materials and assignments from past courses into this space. For more information, see Perusall documentation.
For Zoom and Yellowdig, it is easiest to delete the links and recreate them. You can copy settings from a previous Yellowdig community when the new community is created.
- Columbia University in the City of New York
- Office of Teaching, Learning, and Innovation
- University Policies
- Columbia Online
- Academic Calendar
- Resources and Technology
- Instructional Technologies
- Teaching in All Modalities
- Teaching with CourseWorks
The CTL has developed the videos below to support instructors using CourseWorks to teach online. We also provide support for CourseWorks with technical issues.
The CTL is here to help!
Seeking additional support with using CourseWorks? Email [email protected] or join our virtual office hours .
Interested in inviting the CTL to facilitate a session on this topic for your school, department, or program? Visit our Workshops To Go page for more information.
Cite this resource: Columbia Center for Teaching and Learning (2020). Teaching with CourseWorks. Columbia University. Retrieved [today’s date] from https://ctl.columbia.edu/resources-and-technology/teaching-with-technology/teaching-online/courseworks/
Tools for Community Building in CourseWorks
How do I build community online? This video focuses on various strategies to foster community using CourseWorks tools. We cover syllabi, announcements, the mail tool, Zoom class sessions, and the calendar.
Tools for Promoting Engagement in CourseWorks
How do I engage my students online? This video looks at student engagement with course material, peers, and instructors. It also covers essential CourseWorks tools you can use to support engagement, such as files, modules, discussions, Panopto recordings, and how to modify your course site navigation.
Tools for Assessment in CourseWorks
How can I assess student learning using CourseWorks? This video looks at the tools CourseWorks provides to assess student learning and provide grades, such as the gradebook, Speedgrader, assignments, and quizzes.
Set Up Discussions in CourseWorks
View Tips and Strategies for Online Discussions
CourseWorks provides an integrated discussion tool that allows for interactive communication between instructors and students, focused discussions, and graded assignments.
- Learn how to Create a Discussion Board in CourseWorks.
- Review Discussion Board Best Practices and additional options for using discussion boards in CourseWorks.
Create and Grade Assignments (Setting up Homework and Take-Home Exams) in CourseWorks
Instructors can create assignments in CourseWorks and students can submit them electronically. Once students have submitted assignments, the CourseWorks Gradebook allows instructors to enter grades, track students and their progress, calculate grades, and submit final grades to SSOL.
- Learn how to Create an Assignment in CourseWorks.
- Review the CTL’s quick video tutorial on Using the Gradebook in CourseWorks .
- Engage in a full overview of creating and grading assignments in CourseWorks in the CTL’s self-paced course: Assessment and Grading in CourseWorks .
Create Online Quizzes and Exams
The CourseWorks Quiz tool is best for assessments with questions that list a limited number of answers or options (i.e. multiple choice, true and false, and fill-in-the-blank). Turn on automatic grading to provide immediate feedback to students and to save time.
The CourseWorks Assignment tool is best for more complex responses, such as essays, presentations, videos, or multiple files. This tool allows students to submit multiple files as part of their response. It is also a good option if you intend to have students complete paper-based exams at home and they need to upload pictures of their work as part of the submission.
For more information on the variety of CourseWorks tools, options, and settings that can help implement online exams efficiently and fairly, as well as recommendations on academic integrity, please visit our Creating Online Exams page.
Additional Tools
The following resources offer additional options to facilitate and support remote classes.
- Host a video conference with BigBlueButton (built into CourseWorks).
- Learn more about Lionmail Drive at Columbia.
Further Reading
- Review best practices and strategies for engaging students in online teaching and learning .
- Learn about blended learning practices and experience a guided design process for a blended lesson or unit of study in the CTL’s self-paced course: Blended Learning Essentials .
- Read about Actively Engaging Students in Asynchronous Online Classes (Riggs and Linder, 2016).
- First Steps for Moving a Class Online
- Graduate Student TAs: Adapting Your Teaching
- Inclusive Teaching and Learning Online
- Asynchronous Learning Across Time Zones
- Virtual Office Hours
- Teaching with Zoom
- Teaching with Panopto
- Video Production Best Practices
The CTL researches and experiments.
This website uses cookies to identify users, improve the user experience and requires cookies to work. By continuing to use this website, you consent to Columbia University's use of cookies and similar technologies, in accordance with the Columbia University Website Cookie Notice .

News | Events
Planned downtime.
Continuing Education (CE) Basic Requirements
On this page..., appropriate subject matter, suggested providers of continuing education for licensees, other approved continuing education, ce that doesn't count.
Iowa law mandates continuing education (CE) for nursing licensure renewal. Licensees are responsible for tracking nursing CE credits throughout their renewal period. For more information on renewing your license, visit our Renewals page .
Renewal or reactivation of all licenses requires 36 contact hours of continuing education. Your CE documentation should be ready to turn in for audit purposes and kept for four years. CE credit must be earned within the renewal period to count.
CE offerings must be at least one hour. Every 60 minutes is one contact hour of CE. After the first hour, every 15-minute increment counts for a quarter of an hour of credit. CEs also must be appropriate subject matter to count.
Appropriate subject matter is coursework that applies to nursing practice. Coursework should reflect the educational needs of nurses and the health needs of the public.
Appropriate subject matter for continuing education credit includes:
- Nursing practice related to health care in any setting
- Professional growth and development related to nursing practice
- Patient care and health services
- e.g., nursing theories and biological, physical, behavioral, computer, social, or basic sciences
- Social, economic, ethical and legal aspects of healthcare
- Management or administration of health care, healthcare personnel, or health care facilities
- Education of patients, or their significant others, students, or personnel in the healthcare field
- Courses listed on the NCSBN International Center for Regulatory Scholarship (ICRS) website
- Other national credentialing and accreditation continuing education agencies, which can be found in Iowa Administrative Code 655—5.2(5)
- Iowa Board of Nursing approved providers
- Other approved providers from state boards of nursing that have mandatory continuing education
Below is a list of US states that require continuing education for nursing licensees.
List of Mandatory CE States
- Alaska
- District of Columbia
- Illinois
- Louisiana
- Massachusetts
- New Hampshire
- New Jersey
- North Carolina
- North Dakota
- Oklahoma
- Pennsylvania
- Rhode Island
- South Carolina
- West Virginia
- Wyoming
- Documented attendance to webinars or video events offered by an approved provider
- Self-study or online courses if offered by an approved provider
- National certification or recertification related to nursing will count as 36 contact hours. This includes Case Manager Certification and Certified Clinical Research Professionals.
- Completion of a nurse residency program. A residency program shall be recognized as 36 contact hours of continuing education.
Nurse Refresher Courses
This list of courses is for the information and convenience of the public. The inclusion of a particular course does not constitute endorsement, recommendation, or favoritism by the Nursing Board.
Des Moines Area Community College
RN refresher course.
St. Luke's College UnityPoint Health
Connecticut league for nursing.
RN refresher course.
Nurse Refresher Program - Idaho Board of Nursing
LPN and RN refresher courses.
South Dakota State University
Sigmamarketplace.
Online RN refresher course. If you have a board order requiring theory & clinical, this class doesn't meet requirements.
Colorado Center for Nursing Excellence
- Nursing students.
- Employees transitioning to a new role
- For more information, review the Preceptor Form and Preceptor Q&A . Completion of a nurse residency program counts as 36 contact hours.
Academic credit counts for continuing education (CE) requirements for the renewal period. All courses must be appropriate subject matter. Courses taken beyond those required for original licensure qualify, including electives and prerequisites.
- One semester hour is equal to 15 contact hours of CE.
- One quarter hour is equal to 10 contact hours of CE.
A copy of official college or university transcripts may be requested for audits. The transcript must include:
- the school's name
- the licensee's name
- course date
- course title taken
Grade reports from a college or university are not acceptable.
- Self-help and self-care that are not scientifically supported.
- Cardiopulmonary resuscitation (CPR) and basic life support (BLS).
- Orientation in-service activities.
IMAGES
COMMENTS
To view Course Files in a course, go to Course Management > Files and select the course ID in the menu. This is the top-level folder that contains the files and folders you uploaded to your course. Select a title to see a folder's contents or to view a file. Switch views. You can view files and folders in Course Files as a list of file names or ...
In Course Files, open a file or folder's menu and select Copy or Move.To select multiple items, use the check boxes and select Copy or Move.To rename a file or folder, select Edit Settings in the item's menu.; On the Copy or Move page, select Browse to find a destination folder for the file or folder.; In the Browse Course window, navigate to the appropriate folder and select it.
Create a content item. In a content area, learning module, lesson plan, or folder, select Build Content to access the menu and select Item . Be sure Edit Mode is ON so you can access all of the instructor's options. Type a name and an optional description or instructions. You can use the options in the editor to format text, attach files, embed ...
Keep All of the Files Together. This next approach is one that probably works best for most people. Create a single folder for each project. And inside that folder, place all of the files needed for your course. This includes your assets and published output. With this approach, everything's in one place, making it easy to manage and share files.
You can create Course Files folders and sub-folders needed to organize your files. Creating a logical filing system makes it easy to locate and link to files when creating content in your course. The folder structure in Course Files is separate from folders in a content area of your course and has no impact on the presentation of the content.
Manage Selected Files. To select a file, click the name of the file. You can also select multiple files at the same time by holding the command (MAC) or control (PC) key. When a file is selected, Files displays the file toolbar at the top of the window. Depending on the files area, the toolbar may contain several options to manage the selected ...
2) Course content folder. This folder has directories for each of the classes I have taught previously. The PowerPoints, exams, and other class resources are kept in the folders. The publisher materials also go here, though I tend not to keep archives, since much of the information is redundant and some of the files are quite large.
1. Click on desired Content Area from the Course Menu. 2. Under Control Panel, use the pulldown next to "Packages and Utilities" to choose Export/Archive course. On the next screen, you will probably find that there are no existing export files. You will now create an export file by clicking the "Export" button.
Download and save files and complete courses for later. Send them to friends and colleagues. Modify or remix OCW content for any non-commercial use - just remember to credit OCW as the source. ... The course packs or reading materials used in many MIT courses contain proprietary and copyrighted work that MIT faculty and students are only ...
The CourseWorks Quiz tool is best for assessments with questions that list a limited number of answers or options (i.e. multiple choice, true and false, and fill-in-the-blank). Turn on automatic grading to provide immediate feedback to students and to save time. The CourseWorks Assignment tool is best for more complex responses, such as essays ...
A comprehensive course file is crucial for effective teaching and learning. Learn why a course file is essential for instructors to develop and design their courses, promote transparency and accountability, facilitate program evaluation and improvement, promote consistency and quality, and support student success. Read on to discover how creating a well-designed course file can optimize your ...
Click the Upload option [2]. If your instructor only allows File submissions, the Upload File tool displays in place of the Choose a submission type section. Notes: If the Upload submission type does not display, your instructor has restricted this submission type. Not all of your assignments may be submitted online.
The Course File (CF) is a fundamental component of the Academic Quality Assurance Framework (AQAF). It is required by the university to provide the information needed to ascertain the quality of courses. ... Marked samples from the student work for each assessment method mentioned in point 4, these samples shall include the best, average, and ...
Action: Instructor creates assignment, attaches files, and publishes assignment. Result: Copies of attached files are made for and owned by each student. Action: Student adds and edits files and submits their work. Result: Files are uploaded to SpeedGrader™. Students can still edit their files and submit new versions. Action: Instructor grades and returns the student's assignment in ...
1. Avoid saving unnecessary documents. 2. Follow a consistent method for naming your files and folders. 3. Store related documents together, whatever their type. 4. Separate ongoing work from completed work. 5.
Log in to Columbia University's CourseWorks site, choosing either the graphical or textual option.
Create a folder. You can create folders in the top-level folder of Course Files or inside another folder. Go to the area of Course Files where you want to create a new folder. Select Create Folder and type a name. Select the folder's title to create one or more sub-folders to further organize content.
Academic credit counts for continuing education (CE) requirements for the renewal period. All courses must be appropriate subject matter. Courses taken beyond those required for original licensure qualify, including electives and prerequisites. One semester hour is equal to 15 contact hours of CE. One quarter hour is equal to 10 contact hours ...
Exercise files. Download this lesson's related exercise files. 4.01 work-with-files-and-documents-online - Exercise.docx. 43.7 KB 4.01 work-with-files-and-documents-online - Exercise solution.docx. 593.6 KB. Understand the difference between Office Online and Office Desktop and how to work with files in both of them.
Maximum file size is 35 MB. Please be aware of this limitation when formatting files and resolution for your work. Files larger than 35 megabytes may be rejected by the New York Tech server. Links to materials available through web links, Youtube, Dropbox, or other should be included in a table of contents on the first page of the portfolio.
SWWEL 2059 Second-level Policy Course: Child & Family Policy 3 SWINT 2058 Skill Elective: Social Work in a School Setting 3 SWINT 2099 Specialized Practuice Field Work (must be in a school setting) 6 15 Summer Term SWRES Second-level Research Course (2033, 2051, 2023) 3 SWINT Advanced Direct Practice #2 (2031, 2032, 2033) 3
Set up the file with the desired elements (which we'll cover throughout this blog post) Select the Save as Template command from the File menu; Enter a name for the template and place it in the appropriate Templates folder. Templates are in .sta format; Click Save; To use the template, select File > New, then select Use document template
Minnesota Governor Tim Walz listens during a press conference on August 1 in Bloomington, Minnesota. The Minnesota National Guard disputed Walz's biography, saying he was demoted before his ...
Mr Vance also says Mr Walz made "dishonest" claims about serving in combat. He referred to a video promoted by the Harris campaign of Mr Walz talking about gun control.
To upload a file from your computer, click the Upload File button [1]. When the file window appears, locate and click the name of the file. At the bottom of the window, click the Choose or Browse button (depending on your browser). To upload a file you already uploaded to Canvas, click the Click here to find a file... link [2]. The file list ...
In the Browse Course or Browse Content Collection window, navigate to the file or folder needed and select its check box. You can link multiple files and folders to the content item. When you link to a folder, use caution as students receive the read permission for the folder's contents. Read permission allows students to view all the files and ...
post-baccalaureate pre-medical course-work, Medical College Admission Test (MCAT) preparation, clinical experience/physician shadowing, mentoring by physicians and medical students, and
If you have less than a 2.0 GPA in all college coursework, or less than a 2.0 GPA from the last college you attended, unfortunately you are not eligible for admission to the University of Florida at this time. ... File Completion Deadline Classes Start; Fall 2024 Applications Open: April 29, 2024: May 29, 2024: August 22, 2024: Spring 2025 ...
All required materials must be received in our office no later than the file completion deadline for the term to which you are applying. Helpful Tips. Contact your school or testing agency to see if they can send your official documents electronically. This is the fastest delivery method.
Connecting your students to course resources has never been easier! Ball State University Libraries' Reading Lists application, now featuring a new, easier-to-use interface, gives students simple access to course reserve materials—full-text articles, e-books, Open Educational Resources, streaming music and video, and more. Library staff work behind the scenes to add and activate the ...