

Top 17 Earth Science Experiments
Earth science, the study of our planet and its manifold natural phenomena, offers a world of discovery for curious minds.
We have handpicked a selection of the top 17 Earth science experiments for you to try. Our selection, suitable for a variety of age groups, covers a broad range of topics such as soil analysis, weather patterns, seismic activity, and more.
These hands-on, educational activities will not only deepen your understanding of our dynamic planet but also nurture a keen interest in environmental stewardship.
Get ready to unlock the secrets of our remarkable planet and have a blast along the way!
Earth Science Experiments
1. underwater volcanic eruption.
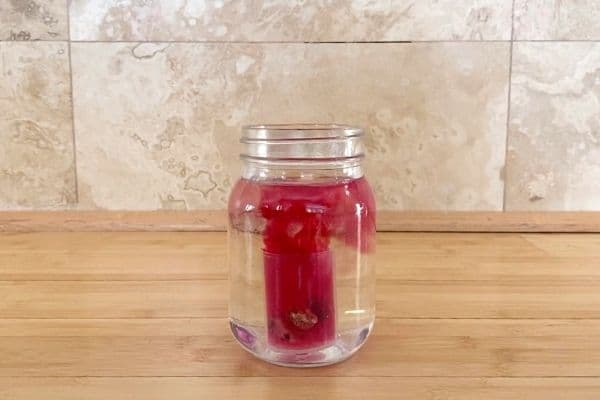
This experiment highlights the connection between geological processes and the delicate balance of life in our oceans. So, get ready to explore the hidden depths of our planet and witness the powerful spectacle of an underwater volcanic eruption.
Learn more: Underwater Volcanic Eruption
2. Ocean Layers in a Jar
This captivating experiment allows you to recreate and explore the diverse layers of the ocean right in front of your eyes.
By layering different liquids of varying densities, you’ll witness the formation of distinct oceanic zones, such as the surface zone, the twilight zone, and the deep-sea zone. So, why should you try this experiment?
3. Layers of the Earth Experiment
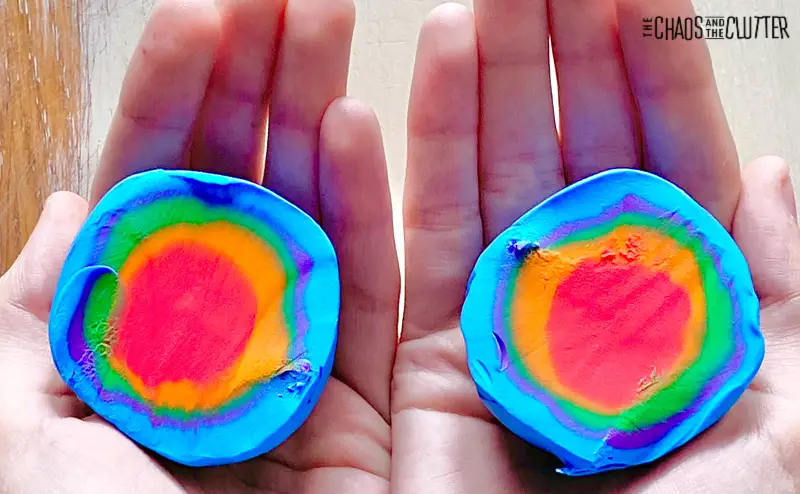
The Layers of the Earth Using Clay experiment offers a unique opportunity to visualize and understand the composition of our planet.
By sculpting the different layers of the Earth, including the crust, mantle, outer core, and inner core, you’ll gain a deeper understanding of their properties and interactions.
Learn more: Layers of the Earth Hands-on Experiment
4. Earthquake Epicenter Experiment
The Earthquake Epicenter Experiment offers a unique opportunity to understand the science of seismology and earthquake detection.
By simulating earthquake waves using simple materials, you’ll learn about the principles of wave propagation and how seismic waves travel through the Earth’s layers.
5. Orange Peel Plate Tectonic
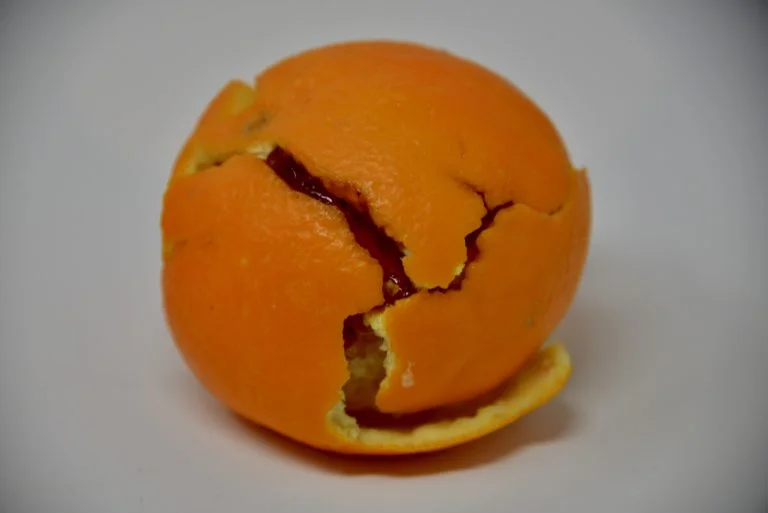
The Orange Peel Plate Tectonic experiment offers a unique opportunity to visualize and understand the dynamics of plate tectonics.
By carefully removing the peel from an orange and observing how it fractures and moves, you’ll gain a deeper understanding of the forces that shape our Earth’s crust.
Learn more: Orange Peel Plate Tectonic
6. Erosion at the Beach Experiment
This hands-on experiment will show students how wave action can cause erosion at the beach.
Weather-Related Experiments
Have you ever wondered about the forces that shape our everyday weather patterns? These engaging experiments offer a unique opportunity to explore and understand various aspects of weather phenomena.
So, why should you try this section of the earth science experiment? Let’s discover the reasons together.
7. The Greenhouse Effect Experiment
The Greenhouse Effect Experiment offers a unique opportunity to comprehend the mechanisms that contribute to the warming of our planet.
By constructing a miniature greenhouse and observing how it traps heat, you’ll gain a deeper understanding of how greenhouse gases, such as carbon dioxide, can impact Earth’s climate.
8. Water Cycle in a Bag
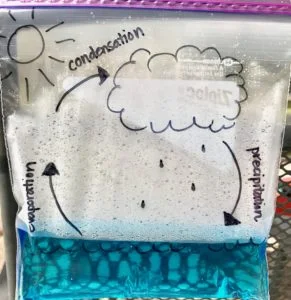
The Water Cycle in a Bag experiment offers a unique opportunity to witness the dynamic nature of the water cycle in action.
By creating a self-contained system within a bag, you’ll simulate the various stages of the water cycle, including evaporation, condensation, and precipitation.
Learn more: Water Cycle in A Bag
9. Create Your Own Cloud
Have you ever wondered how clouds form and what makes them float in the sky? This captivating experiment allows you to create your very own cloud right in the palm of your hand. So why should you try this experiment? Let’s discover the reasons together.
10. Rain in a Jar
The Rain in a Jar experiment offers a unique opportunity to learn about the process of rain formation. Through this hands-on activity, you’ll witness how water vapor condenses and transforms into droplets, ultimately leading to rainfall.
11. Instant Snow Experiment
This enchanting experiment allows you to experience the magic of snowfall right before your eyes. So, why should you try this experiment? Let’s uncover the reasons together.
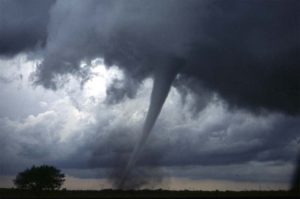
12. Tornado in A Jar
The Tornado in a Jar experiment offers a unique opportunity to explore the science behind tornado formation.
By swirling water and observing the creation of a miniature tornado-like vortex, you’ll gain a deeper understanding of the atmospheric conditions and dynamics that give rise to these powerful storms.
Soil Experiments
Through a series of engaging and hands-on experiments, we will unravel the mysteries of soil composition.
Join us as we explore the intricate world of soil through experiments that will ignite your curiosity and deepen your understanding of the vital role soil plays in sustaining life.
13. Build a LEGO Soil Layers
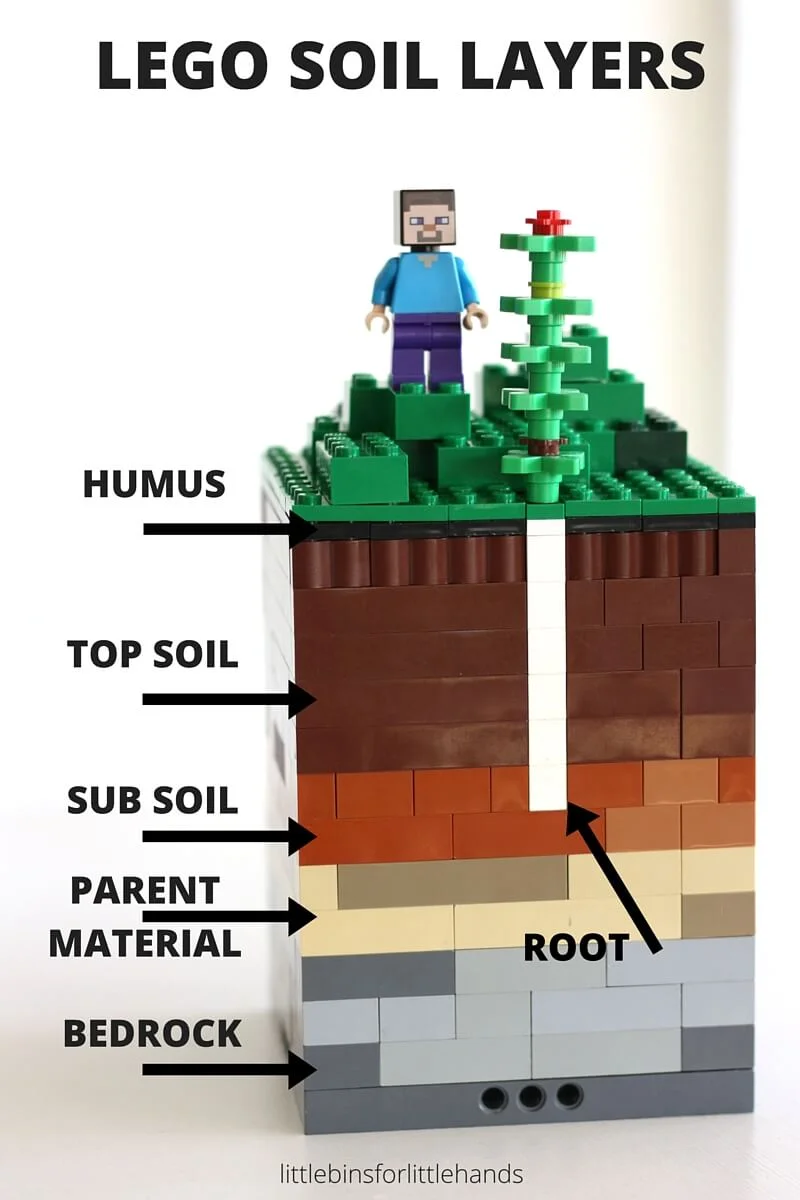
Lego! Join us on this hands-on journey to understand the composition and characteristics of soil layers.
Grab your Lego bricks and let’s start building an amazing understanding of the Earth beneath us!
Learn more: Build a LEGO Soil Layer
14. Testing Soil Experiments
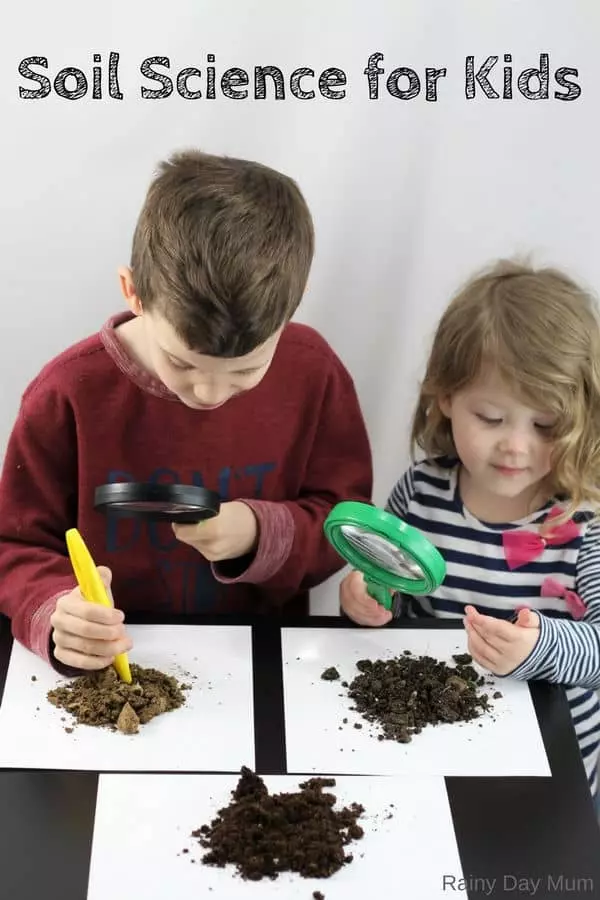
Understanding soil composition and its properties is crucial for agriculture, environmental studies, and even construction.
By conducting these experiments, you will learn how to analyze soil samples, measure pH levels, assess fertility, and determine the best conditions for plant growth.
Learn more: Testing Soil Layers
15. The Science of Erosion
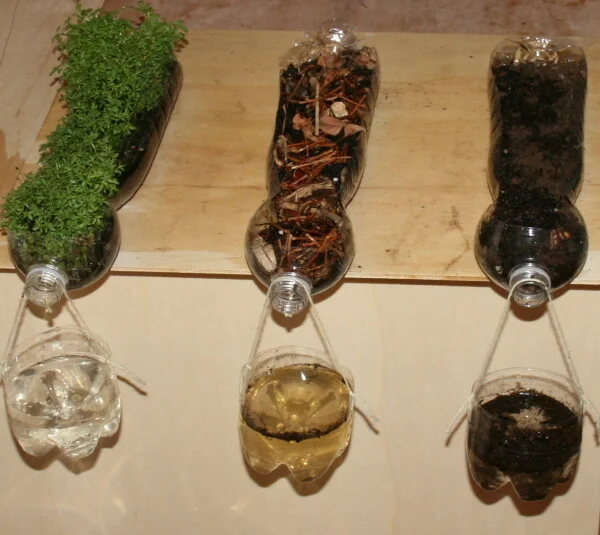
Through these experiments, we will explore the factors that contribute to soil erosion and discover ways to prevent it. Join us on this scientific adventure as we study erosion rates, simulate erosion processes, and learn about the importance of soil conservation.
Learn more: The Science of Erosion
16. Making Groundwater
Through hands-on exploration, you will learn about permeability, porosity, and the essential role of groundwater in our ecosystems. So, grab your tools, roll up your sleeves, and join us in making groundwater as we unravel the fascinating underground world beneath our feet.
17. Make Your Own Water Filter
This hands-on experience will empower you to explore the principles of filtration, observe how different soil components and materials contribute to the purification process, and gain valuable insights into water treatment methods.
Similar Posts:
- 37 Water Science Experiments: Fun & Easy
- 68 Best Chemistry Experiments: Learn About Chemical Reactions
- Top 100 Fine Motor Skills Activities for Toddlers and Preschoolers
Leave a Comment Cancel reply
Save my name and email in this browser for the next time I comment.
12 Awesome Earth Science Experiment Ideas For Classrooms or Projects
- January 22, 2024
- DIY Projects , Weather Education
24 Comments

Earth science can be a lot of fun…or it can be incredibly boring!
Unlike chemistry and physics, demonstrating earth science phenomena requires a little more creativity than heading over to a lab and simply replicating the concept.
However, that’s what makes it all the more fun!
Having taught earth science, I know how hard it can be to make it fun for your students. These are 11 of my favorite experiments to do with my students – all of them will have them curious and most importantly enjoying the moment and learning!
Table of Contents
Safety precautions, instructions:, how it works:, how it works, instructions.
First and foremost, the most important thing to keep in mind before doing any science experiment is SAFETY.
Be sure to wear protective goggles for your eyes, and protective gloves when necessary.
We’re not dealing with dangerous chemicals in any of these experiments but protective eyewear is an absolute must in any case.
If young children are doing these experiments, be sure to supervise them!
1) Cloud in a bottle( credit )
Making a cloud in a bottle is really fun and exciting! It happens nearly instantly, too.
Why this is a great experiment: Cloud formation normally takes a long time – this experiment is a neat way for students to visualize this vital life-giving process. You’ll be able to see how water vapor condenses around aerosols to make a cloud.
What you need:
- A plastic soda bottle
- A pump with a rubber seal
- Rubbing alcohol
Fill about half a cm or so of water in the bottle and swirl it around so it wets the bottom sides of the bottle.
Light a match, put it out, and hold it in the bottle so some smoke goes in.
Seal the bottle with the pump, and start pumping air into the bottle.
As you increase the pressure by pumping more air, you’ll find that the seal may want to pop off. Hold it in!
After 5-10 pumps, you have created a decent amount of pressure. Pull the seal off the bottle, and you’ll get a beautiful cloud inside the bottle!
You can also do this using rubbing alcohol(don’t use a match in this case). Rubbing alcohol evaporates faster, and may give you a denser cloud.
When you increase the pressure, the water or alcohol vapor starts getting compressed and pushed together. When you release the pressure, the temperature inside the bottle drops slightly, allowing the vapor to expand and condense into a cloud.
A cloud is basically vapor condensed around dust/dirt particles in the air – by forcing the vapor to condense and providing something to condense around, we can make a cloud in a bottle!
2) Imploding can
This is one of my favorite experiments to do because it demonstrates the power of atmospheric pressure even though it is something we don’t feel every day.
Why this is a great experiment: Students can have a hard time visualizing and understanding how the atmosphere has weight and exerts pressure, especially since they can’t feel it/see it/or touch it. The force and speed at which the can – or a drum – whatever you have on you is crushed demonstrates the awe-inspiring amount of atmospheric pressure and makes you really appreciate how we are adapted to survive!
This experiment is fairly straightforward. You need:
- An empty soda can or water drum
- A pair of tongs to handle hot objects
- A bowl or bucket of ice water
- Optional: a stopper
Fill about 1 cm of water into the soda can, and hold it over the flame until the water starts boiling and steam starts coming out of the opening.
Let steam come out for half a minute to one minute.
Before the steam runs out, quickly place the can upside down in the ice water(so the opening goes into the water).
In one or two seconds, the can will get crushed.
If you’re using a larger drum, then you can stopper the drum after a minute or so, and start pouring the ice water on top of the drum.
The drum will also implode.
As the water boils, the steam will begin to push out any air inside the can, reducing the pressure inside the can compared to the outside. Once enough air has been pushed out, the pressure will be significantly lower. The can is still very hot, so the molecules are still very energized – which is creating some extra pressure on the inside.
3) Pulling apart two hemispheres
This is another awesome experiment to show how much pressure the atmosphere actually exerts. The principle behind it is really simple, since it shows how every day suction cups work, too.
Why this is a great experiment: Otto von Geuricke, a German scientist, was the first person to do this experiment to demonstrate atmospheric pressure. He tried to use horses to pull the two hemispheres apart, but even they could not do it. Have your students/visitors try pulling apart the spheres!
- Two hemispheres(any rigid material such as plastic or metal) with mating, rubber-sealed rims so they fix into one another. (Find it on Amazon here )
- A vacuum cleaner or pump to suck out the air from in between
- Volunteers to try to pull the spheres apart!
Fix the two hemispheres together, then insert a vacuum hose or a pump into the hemispheres and proceed to suck the air out.
Once all the air has been evacuated, seal the inlet hole, and now ask your students to try and pull the hemispheres apart.
When there is air inside the hemispheres, the pressure inside and the pressure outside is the same, so there is no net pressure being exerted anywhere. It is easy to pull the hemispheres apart.
Once the air from the inside has been evacuated completely(or even partially), the pressure on the outside increases and is greater than the pressure on the inside, so the hemispheres are pushed together by the entire weight of the atmosphere!
When you try to pull the spheres apart, you’re going up against the collective pressure of the atmosphere.
Once you let air back into the spheres and the pressure equalizes, the two spheres will come apart easily. 4) Sedimentary rocks with bread( credit )
Sedimentary rocks are a huge part of earth’s geological processes – and rocks can get boring!
Why this is a great experiment: To make things like rocks more appealing to students, this simple experiment can demonstrate how sedimentation works and how sedimentary rocks are formed.
Here’s what you’ll need:
- Slices of white bread(as many as you want, at least 2)
- Slices of brown bread(as many as you want, at least 2)
- Books (preferably heavy)
Lay a piece of wax paper on a surface.
Cut the crusts off your slices of bread, and begin stacking them alternately.
Once your slices have been stacked, measure their height, then place another piece of wax paper on top, and put as many books as you can balance. You want to try and create a lot of weight.
Leave it be for one week.
After one week, remove the books and measure the bread again. You will see that the bread has become a lot more compressed, and you can see the layers of white and brown bread in between.
This experiment demonstrates how sedimentary rocks form. Each year, millions and millions of tons of sediment are deposited on the ocean floor. As new sediment comes, the bottom sediment starts compressing due to the weight of the top layers, and water is squeezed out.
Over time, the sediments harden into rocks. If you break a sedimentary rock open, you would be able to see the individual layers to a great extent.
You can modify this experiment by changing the amount of weight you place on the slices and the time you place it for.
5) Acid rain ( credit )
Acid rain is a real problem thanks to CO2 emissions. It damages statues and buildings, and can even cause harm to crops.
Why this is a great experiment: The striking results of the experiment will help demonstrate the gravity of the situation to students.
What you’ll need:
- Blackboard chalk
- (optional) a knife
- Measuring cup
- 4 plastic cups
To start, make sure that the chalk reacts with vinegar by putting a few drops of it on the chalk. You should see little bubbles form.
Number your four cups from 1 to 4.
In cup 1, mix one tsp vinegar with 1 cup of water.
In cup 2, mix two tsp vinegar with 1 cup of water.
In cup 3, mix three tsp vinegar with 1 cup of water.
In cup 4, mix four tsp vinegar with 1 cup of water.
Place your four pieces of chalk(carve them up into any shape if you wish) into four plates, and number the plates, too.
Put 10 drops from cup 1 onto the first piece of chalk.
Put 10 drops from cup 2 onto the second piece of chalk.
Put 10 drops from cup 3 onto the third piece of chalk.
Put 10 drops from cup 4 onto the fourth piece of chalk.
Put some of the vinegar solution on the chalk twice a day for 5 days.
At the end of 5 days, observe how the chalk has changed.
Chalk is made from calcite, which reacts with acids. In the reaction the chalk is also eaten away. Over a long period of continued acid rain, monuments made from marble(a form of calcite) and buildings made of limestone will be eaten away as the acid rain slowly dissolves them.
6) Why is the sky blue( credit )
The color of the sky is due to a phenomenon called refraction. Throughout the day, you’ll see the color of the sky change from orangeish-yellow to blue and back to orange-yellow. You can replicate this phenomenon in a glass!
Why this is a great experiment: You can use this experiment to demonstrate how light is refracted through particles in a liquid(which behaves similar to how particles are refracted through particles in a solid).
Requirements:
- A bit of soap(liquid or bar, white is better)
- A flashlight that emits white light
Mix some soap into a glass of water until the water is white and milky.
Place the flashlight or bulb near the glass.
Find the proper angle: once you look at the glass correctly, you’ll see that the liquid looks blue.
You can attempt to create variations by adding more soap to the water, or holding the bulb(and observing) at different angles.
When light from the sun hits the atmosphere, it is scattered through a phenomenon called Rayleigh scattering. The shorter wavelengths are scattered more, and blue/violet is scattered the most, which is why we perceive the sky as blue(not violet, because our eyes are more used to seeing blue than violet).
A similar process happens in colloids(liquids with solids in them). This process is called Tyndall Scattering.
7) Creating a spark of lightning( credit )
Lightning is static electricity: so the best way to demonstrate how lightning works is by generating and discharging some static electricity!
Why this is a great experiment: Lightning is incredibly powerful: hundreds of thousands of volts. Static electricity(everyday shocks at least) are harmless, even though they’re essentially the same thing. This experiment is a great way to inspire awe for mother nature.
- A metal object(such as a spoon)
Inflate the balloon and rub it on your hair for two minutes.
Go into a dark room, and touch a spoon or metallic object to the balloon. You’ll see some sparks fly!
By rubbing the balloon on your hair or on a piece of wool, you’re charging it up. By touching the metal spoon to the balloon, the opposite charge from the metal jumps towards the charges on the balloon, and the energy is discharged as a spark and electric shock.
Inside clouds, lightning forms when colliding particles of ice create a giant charge in the bottom of the cloud. When the charge at the bottom of the cloud meets an opposite charge from the ground, the energy is discharged in a brilliant flash of light and electricity we know as lightning .
8) Percentage of oxygen in the atmosphere
We’ve all been taught that oxygen is about 20-21% of the atmosphere, but how can we actually measure this? Where did we come up with this number?
You can do a controlled experiment to see how much oxygen there is in the atmosphere.
Why this is a great experiment: This experiment lets you visualize a fact that we’re taught from very early on, but perhaps did not give much thought to how we managed to measure such a number!
Required materials:
- A test tube
- A plastic container or box
- A hand warmer or some steel wool
Tape the hand warmer or steel wool to the bottom of the test tube.
Next, fill the container with water, and insert the test tube into the container upside down so the wool or hand warmer is at the top.
Measure the height from the current water level to the top of the test tube.
Over some time(it may take a few days), the water level will begin to rise. Once the water stops rising, measure the distance from the new water level to the top of the test tube.
You should find the difference is around 20%, or the percentage of oxygen in the atmosphere!
The steel wool/hand warmer reacts with oxygen in the test tube. As the oxygen is used up, water is pushed up the tube by air pressure on the outside to fill the vacant space up left by the oxygen.
This is a really neat experiment because it will also show air pressure at work, too!
9) Growing your own crystals ( credit )
Crystals are fascinating and an integral part of mineral formation in the earth’s crust. There are LOTS of ways to grow crystals(I’ll cite videos below) but this is one of my favorites and makes the biggest crystals!
Why this is a great experiment: What’s cooler than to be able to make your own gem-like crystals? Kids will really enjoy using these crystals as decoration and ornaments.
What you’re going to need:
- Alum(potassium ferricyanide), can sometimes be found in a grocery store in the spices section
- A saucer or petri dish
- Some taut string or fishing line
In the beaker, add alum slowly to 1/4 cup of very hot water and stir to dissolve. Keep adding alum until it no longer dissolves. This means the solution is saturated.
Pour some of this solution into your petri dish and let it sit overnight. Use a filter when pouring so no solids or impurities go through.
You should see small crystals growing in the dish by the next day. When they’re a little bigger, pour off the solution from the dish, and choose the best crystal(biggest) from it.
Tie the crystal with your fishing line, and tie the other end of the fishing line to the string. You’ll use the pencil to balance the crystal in a solution in the next step.
Make another alum solution using 1/2 cup of water , and pour it into a beaker or jar – use a filter again if necessary to leave out undissolved material.
Place your pencil-fishing-line-crystal into the solution – use the pencil to balance on the rim of the beaker, and the crystal should be suspended right in the middle of the solution. Make sure it’s not touching the side or bottom of the beaker.
Bear in mind: If you see that the crystal is getting smaller instead of bigger, then it means the solution is not saturated enough. Remove the crystal, heat the solution, and dissolve more alum.
Cover with a towel or piece of paper to keep dirt out, and watch your crystal grow over the next few days.
Remove it from the solution once you are happy with its size, and dry it off with a towel.
The crystallization process is called “nucleation”. Because the solution was saturated, as the solution cooled down, there was no longer enough space in the solution to keep the molecules dissolved, so they began to precipitate out. The molecules find one another and join up in a crystal pattern.
More and molecules join up until you see a crystal!
Even if there was no seed crystal, the molecules would eventually precipitate out, but the crystals would not be very visible because every molecule was trying to become a nucleus.
10) Convection currents
Convection currents are responsible for almost all atmospheric and water circulation.
Why this is a great experiment: This simple experiment demonstrates how convection currents work, and also shows how air is a fluid. It’s a two in one!
- A large beaker
- A smaller beaker that fits in the large beaker
- A bit of plastic wrap
- A rubber band
- Food coloring of your choice
Fill the large beaker with cold water.
Fill the smaller beaker with hot water and add a few drops of food coloring, then mix well.
Cover the small beaker with plastic wrap and use the rubber band to seal it nice and tight.
Place the small beaker inside the large beaker, and using your knife, slit the plastic. One long slit should be enough.
The hot water will begin to rise and form convection currents.
Hot water(and air) will rise. As the water rises, it is exposed to the colder water, so it also cools down. The cooler water then begins to sink, forming a large circular motion of going up, moving to the side as it gets colder and hits colder water, and sinking again.
Atmospheric convection currents work in the same way.
Here is a variation:
11) Solar water purifier( credit )
This is a great survival skill and also highlights one of the most important processes for life on earth: evaporation of seawater.
Why this is a great experiment: This is an excellent way for students to visualize how seawater evaporates – which leads to the ultimate formation of clouds. Plus it shows students how to distill water.
- Short glass or beaker
- Plastic wrap
- Masking tape
- A small weight such as a rock
Mix salt into two cups of water until it has dissolved, and pour the water-salt mixture into a large bowl.
Place the beaker in the middle of the bowl. The beaker should not come above the rim of the bowl, but it should be above the water level.
Cover the bowl with plastic wrap, and seal the bowl as best as you can from the side – you can use tape if you need to.
Place the light weight on the plastic right above the beaker.
Now place the bowl outside in the sun for a few hours – or the entire day. You can even experiment to see how much time it takes to get how much water – but you’ll need to make sure the weather conditions are similar every day to control your variables.
Once you check again, you’ll see that there is water in the beaker. Taste it to see if it is salty or sweet.
The water in the bowl was warmed by the sun, then it evaporated and became water vapor. The vapor rose up, hit the plastic, and condensed back into water droplets. The droplets followed the contour of the plastic created by the weight on top, and dripped into the glass.
12) Stalactites and Stalagmites( credit )
Stalactites and stalagmites are an essential natural process in the formation of caves. If caves are not easily accessible where you live, this experiment can help you make a “mini” cave right at home or in the classroom!
Why this is a great experiment: While the principles in this experiment are very similar to those in the crystal growing experiment, this adds another factor of gravity!
- Epsom salts
- A bowl or pot
- String or paper towel
- Weight such as paper clips
Measure off one glass of water, pour it into the bowl, and start mixing in the epsom salts. You’ll need to mix in a LOT of salt and dissolve it to get this experiment to work, so you may find that heating the water as you mix makes it easier.
Divide the mixture between the two glasses.
Grab your piece of string, put a paperclip on both ends, and drop the ends in the glasses. The glasses should be close to one another, and there should be enough give in the string that it dips in the middle between the two glasses.
Over a few days, you should see your stalactites and stalagmites begin to form.
Capillary action causes the water to flow up the string on both sides.
At the dip in the string, the water begins to form a drop. As this water evaporates, the epsom salt you dissolved in it earlier will start to precipitate out and form deposits.
Related Posts

Incredible Role of Sunlight: What You Need to Know
- April 10, 2024

Static Shock Solutions: Why You Get Zapped and How to Stop It
- April 8, 2024

Leave a Reply Cancel Reply
Your email address will not be published. Required fields are marked *
Name *
Email *
Post Comment

- Facts About Earth
- The Rock Cycle
- Earthquakes
- Experiments
- Science News
- Privacy Policy
- Kids Earth Science Blog
Books - Buy Here!
Earth Science Experiments
Earth science experiments require more materials and time than science activities. Often these experiments can become a science fair project by using the scientific method.
Each of the experiments contains an introduction that gives background information about the project. The materials used for the different experiments usually can be found around the home, are recycled materials or can be purchased at a nearby store.
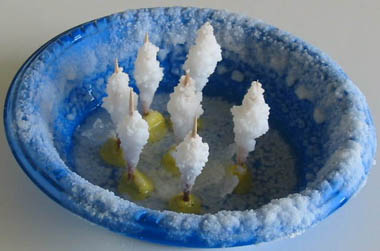
Easy science experiments
These are some Earth science experiments that are fun and easy which you can perform with a minimum of materials. Pressing Layers , a sedimentary rock experiment, uses slices of bread, wax paper and books. Pumice and obsidian is a fun experiment that examines how air bubbles can change the texture of pumice so that the rock floats! Our Salt on a Stick experiment pictured above uses just salt, toothpicks, clay and water.
Funny bones is a fun Earth science experiment using chicken bones. The experiment is easy and you will be able to bend chicken legs and other bones easily. Have you ever tried to balance a pencil on the edge of a table? Try adding a potato and fork to the experiment and it get a little more complicated. Learn more about this experiment called Balancing Act .
Classic science experiments
Some of our experiments are classics or recent classics. The Mentos experiment is an example of a recent experiment that has become a classic. Try this fun experiment with a few extra hints that you might not know about. Try to see if you can get your liter of pop to shoot 12 feet into the air.
Have you ever experimented with shooting rubber bands just for fun. In our experiment Rubber Band Shoot Out you will be testing the elasticity of different size rubber bands to see how far them will travel. Get some friends together and have a rubber band shoot out like the kids in the picture.
More Links to Science Experiments
- Science Experiments, Great Ice Cube Race The great ice cube race tests the time it takes for different shapes of ice cubes to melt.
- Water Cycle Experiments, Acid Rain Learn what happens when acid rain falls on objects made of calcite in this experiment.
- Volcano Experiment, Volcanic Eruptions Find out what happens when expanding gases in magma cannot escape beneath a volcano.
- Water Cycle Experiment, Salt on a Stick This experiment combines science and history as it shows how Indians collected salt and exchanged it for obsidian.
- Simple Science Experiment, Rubber Band Shoot Have fun shooting rubber bands in this fun and easy experiment.
- Simple Science Experiments, Pressing Layers Discover how bread slices can turn into sedimentary layers in this fun experiment.
- Cool Science Experiments, Funny Bones In these fun experiments find out how you can create "funny bones" that can bend.
- Easy Science Experiments, Pumice & Obsidian Find out the difference between pumice and obsidian and why one will float and the other will sink like a rock.
- Volcano Science Experiment, Cinder Cones Have you ever wondered how volcanoes get their shape? Find out about cinder cones in this fun activity.
- Gravity Experiments, Balancing Acts Learn how to balance a potato, fork and pencil on the edge of a table.
- Elementary Science Experiment, Earthquake Waves Create your own wave box that makes paper clips jump when earthquake waves pass through them.
- Gravity Experiment, Topsy Turvy Plants Have fun growing tomatoes upside down in this fun experiment.
- Elementary Science Experiments, Bird Feeders Study the feeding habits of wild birds in your back yard or porch area in this interesting experiment.
- Science Experiment, Mentos Experiment Have fun creating a geyser of diet coke in the fun and exciting experiment.
- Earth Science Experiments Check out all our Earth science experiments that can easily be turned into a science fair projects.
- Earth Science Learn about planet Earth, Rock Cycle, Volcanoes and many more topics on this website.

KIDS FUN SCIENCE BOOKSTORE
Check out Myrna Martin's award winning textbooks, e-books, videos and rock sets. The Kids Fun Science Bookstore covers a wide range of earth science topics. Click here to browse.
Would you prefer to share this page with others by linking to it?
- Click on the HTML link code below.
- Copy and paste it, adding a note of your own, into your blog, a Web page, forums, a blog comment, your Facebook account, or anywhere that someone would find this page valuable.
Sign up to our monthly newsletter and receive our FREE eBook containing 3 fun activities that don’t appear in any of our other books!
The Kids Fun Science monthly newsletter will include the following: current events, weird and fantastic facts, a question of the month, science trivia and the latest new content from our website.
We respect your privacy and you can be assured that we will never share your email address or use it for any other purpose than to send you our newsletter.
Kids Fun Science Bookstore
Award winning Earth Science materials
Main Topics
Kids science news.
©Copyright 2012-2023 Ring of Fire Science Company All rights reserved

The Experiment Archive
Earth science experiments

Vakuumförpackningen

Water cycle in a jar

Homemade rainbow
Tamed lightning

Crystal egg geode

Special: Fire tornado

Water thermometer

Salt water purifier

Water mass meeting

Spinning spiral snake

Cloud in a bottle 1

Cloud in a bottle 2

Homemade compass

Soil layers

Heavy paper
Content of website.
Top Ten Projects
- Candle Race
- Home-Made Glue #1
- Soil Erosion
- Volcanic Gas
- Accelerate Rusting
- Vibrating Coin
- Mentos Soda Volcano
- Musical Bottles
- Human Battery Power
Latest Projects
- Sweet Erosion
- Your Planetary Age
- Exploding Ziploc
- Dehydrated Potato
- Homemade Windmill
Want to contribute?
Earth science.
Earth Science is the science of the study of the earth and it's components. Earth science, also called geosciences, encompasses all sciences that relate directly to the planet earth, including aspects of other science disciplines such as physics, mathematics, and chemistry.
All projects
To measure the amount of cloud cover using just a few simple tools found around the house.
To investigate the composition of a shell.
To demonstrate how heat causes the expansion and contraction of materials by creating a heat sensor.
To demonstrate how the solar system, specifically the water cycle, produces fresh drinking water through desalination of sea water.
To demonstrate the erosion effect of water on soil.
To demonstrate with a hands on experiment how fog forms.
To create home-made Geodes of varying colors!
To demonstrate volcanic activity by making our very own working homemade volcano.
To simulate the formation of limestone that occurs in nature.
To determine whether the temperature of the water in the ocean changes with its depth.
To demonstrate the process of osmosis
To demonstrate how pressure can cause a volcanic eruption.
To demonstrate the devastating effects of soil erosion and its impact to the world's agriculture.
To construct an improvised tube which will be used to observe the stars and be able to answer the question “Do you think stars move in outer space?”
To demonstrate how caves and rivers are formed through the process of erosion
To identify which type of rock is the most porous.
To demonstrate how the vortex of a tornado works in nature by mimicking the environment that produces a tornado.
To demonstrate that water vapor is given off by plants as a result of photosynthesis
To demonstrate how volcanoes give off gas.
To determine whether heat or air flow causes water to evaporate the fastest.
To calculate what your age would be if you lived on another planet.
All Projects List
All categories.
home | about us | support | link to us | usage agreement | privacy policy | sitemap article resources -->
Copyright 2007, Sciencefairadventure.com. All Rights Reserved.
- Skip to primary navigation
- Skip to main content
- Skip to primary sidebar
Teaching Expertise
- Classroom Ideas
- Teacher’s Life
- Deals & Shopping
- Privacy Policy
20 Earth Science Activity Ideas: Experiments, Observation, DIYs, And Discussion
March 22, 2024 // by Laura Spry
Providing quality hands-on experiments for kids will develop their earth science and hopefully spark curiosity in learning more about the natural world. Many kids struggle with traditional book-based learning and thrive when working through experiments. These engaging activities will give your hands-on learners a chance to shine! Let’s take a look at 20 exciting earth science activities for kids.
1. Tornado in a Bottle
For this, you will need two 2-liter bottles, duct tape, water, and dish soap. Fill one of the bottles with water until it’s 3/4 full and add a squirt of dish soap. Take the empty bottle and place it on top- opening to opening. Secure with tape. Moving the water between the two creates a cool tornado effect!
Learn More: Team Cartwright
2. Baking Soda Science
For this science experiment, you will need, mini cups, a round tray, an eyedropper, baking soda, blue and green food coloring, and vinegar. Place your mini cups on your round tray, and fill each with a spoonful of baking soda and a drop of food coloring. Add vinegar, and watch what happens!
Learn More: Little Bins for Little Hands
3. Egg Shell Gardens
Save some eggshells and rinse them before use. Place moistened soil and a couple of seeds in each eggshell and place them in a sunny window. Finely mist the seeds each day until they sprout. Kids can keep a record of the changes they see each day.
Learn More: Garden Betty
4. Water Cycle in a Bag
For this fun water cycle experiment you will need a ziplock bag, a sharpie, water, and food coloring. Draw a simple water cycle on the bag and leave it in a warm window. Come back in a couple of hours and see what has happened!
Learn More: Little People Thinking Big
5. Build a Desert Biome
Teach basic earth science with this super fun activity that requires a sealable jar, sand, dirt, sticks, rocks, desert plants, and water. Pour a mixture of dirt and sand into the jar. Kids can then arrange their rocks and sticks on top of this as they wish. Seal and place in a sunny window. After a couple of days, you should notice condensation appear; this means your biome is working!
Learn More: STEAMsational
6. Salt Dough Islands
Provide each student with a blue paper plate, some salt dough, and air-drying clay. They can mix the dough and clay together to create land on their earth plate. Leave these to dry overnight then and then have learners paint them using acrylic paint.
Learn More: Around the Kampfire
7. Ocean Oil Spill
This activity teaches kids how oil spills happen and how hard they are to clean up. Fill a tub with water and blue food coloring. Add boats and marine animal toys. Let the kids play with this for a while before adding a small amount of olive oil. Discuss how you are going to clean up the ocean; providing a variety of methods, such as paper towels, sponges, etc.
Learn More: One Time Through
8. Cloud in a Jar
Kids will be amazed by this! You will need a glass jar with a lid, hot water, hairspray, and ice cubes. Start by adding 1/3 cup of boiling water to the jar, spray hairspray into the jar, and quickly seal the lid with the ice on top. Watch as a cloud forms in the jar!
Learn More: No Time for Flashcards
9. Comparing Soil Experiment
Ask students which type of soil they think will be best for planting. Students can test this by putting a small amount of 3 different soil types in a coffee filter secured onto plastic cups with a rubber band. When water is added, they will record their observations and draw a conclusion.
Learn More: Sarah Snippets
10. Ocean Layers Activity
This activity introduces students to the 3 main layers of the ocean; surface ocean, deep ocean, and seafloor sediments. Students must weigh out the different ingredients and record what happens when these are placed together in the glass jar.
Learn More: From Engineer to SAHM
11. Volcano Activity
Making a volcano is a classic science experiment. You will need, play dough, baking soda, vinegar, and red food coloring. Place a cup in the center of a tray and build your volcano shape around this with the play. Then, take it outside and add baking soda to the crater before adding vinegar and waiting for an eruption.
Learn More: Happy Brown House
12. Core Sampling Activity
This is a great hands-on geology experiment to teach earth science concepts. Discuss the different layers of the Earth. Assign a different color play dough to each layer and have kids build a section of the earth’s layers. Provide a straw for kids to dip into the earth to retrieve a sample.
Learn More: Homeschool-Rebecca Reid
13. Solar Energy Balloon
Learners can paint one plastic bottle white and one black. Once dry, they can attach a balloon to each neck of the bottle and place them in the sun. Kids will notice that the air in the black balloon heats up faster and inflates the balloon faster.
Learn More: E is for Explore
14. Bird Feeder Science Craft
Students can plan their bird feeder and discuss what materials will work well and be long-lasting. Here, they used popsicle sticks to create a tray effect and used pipe cleaners for it to hang from.
Learn More: Steam Powered Family
15. Refraction of Light Activity
Discuss how different colors are refracted by different angles due to their different wavelengths. So, when light is refracted it disperses into different colors. Demonstrate this by placing a glass prism in direct sunlight to produce a rainbow effect.
Learn More: Rookie Parenting
16. Earth Layers Activity
This 3D earth layers activity helps kids understand the structure of the Earth. You will need 5 colors of modeling clay and some dental floss. Learners can form a ball for the core, and add another layer for the inner core, outer core, and so on. Once this is complete, they’ll use the dental floss to cut a layer out to reveal all the other layers.
Learn More: The Chaos and the Clutter
17. Earth Skittles Experiment
Kids love this colorful activity! Have them arrange blue and green skittles on a white plate in a rough Earth-colored pattern. When warm water is added, kids will see the colors melt away; creating this fun blending effect!
Learn More: Crafty Morning
18. Coffee Filter Earth
For this activity, you will need coffee filters, blue and green markers, and a spray bottle filled with water. Remind kids how much water there is on Earth so a large amount of this will need to be colored blue. Once they have colored their Earth, they can spray it with water and watch all the colors blend.
Learn More: About a Mom
19. Rising Water Experiment
Place a candle in the middle of a bowl and secure it with play dough. Next, learners can add a mixture of food coloring and water to a depth of about 1cm and light the candle. Ask kids to predict what happens next! Place a mason jar over the candle and watch as the water rises when the candle goes out.
Learn More: Mombrite
20. Banana Water Decomposition Experiment
Get your students to place two different food scraps into bottles and fill them with water; placing an uninflated balloon over the bottlenecks. One bottle should be a control bottle with water only. Learners can place them in the sun and observe what occurs after 7-10 days. The gas created during decomposition should have inflated the balloons.
Learn More: Raising Global Kidizens
- Earth Science
- Physics & Engineering
- Science Kits
- Microscopes
- Science Curriculum and Kits
- About Home Science Tools
Resource Center Home > Science Projects > Science Fair Projects > Earth Science – Science Fair Projects
Earth Science Fair Projects
Find earth and space science fair project ideas for astronomy, geology, weather, and more. Find ideas to get you started with your own science fair project like designing an astrolabe, or using a black light to test for fluorescent minerals.
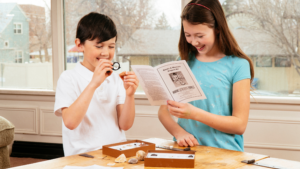
Discover the science of crystals and grow two different types of beautiful crystals!

Did you know that you can use the stars to tell directions at night? Find your latitude using an astrolabe.
Test the power of phototropism with this fun science project!

A brief guide to exceptional science projects and science project videos on the web.

Build a mini solar car to see how to use solar energy for power.

IMAGES
COMMENTS
Earth science, the study of our planet and its manifold natural phenomena, offers a world of discovery for curious minds. We have handpicked a selection of the top 17 Earth science experiments for you to try. Our selection, suitable for a variety of age groups, covers a broad range of topics such as soil analysis, weather patterns, seismic ...
3) Pulling apart two hemispheres. This is another awesome experiment to show how much pressure the atmosphere actually exerts. The principle behind it is really simple, since it shows how every day suction cups work, too.. Why this is a great experiment: Otto von Geuricke, a German scientist, was the first person to do this experiment to demonstrate atmospheric pressure.
- For tips on performing your experiment and presenting your project, see our free science fair guide. - Browse our Science Fair Supplies category for more project ideas and easy-to-use kits. Astronomy. Use a spectroscope to identify and compare the elements of different stars (e.g., look at a blue star like Sirius compared to a red one like Betelgeuse). ...
Over 1,200 free science projects searchable by subject, difficulty, time, cost and materials. Browse the library or let us recommend a winning science project for you!
Science Experiment, Mentos Experiment Have fun creating a geyser of diet coke in the fun and exciting experiment. Earth Science Experiments Check out all our Earth science experiments that can easily be turned into a science fair projects. Earth Science Learn about planet Earth, Rock Cycle, Volcanoes and many more topics on this website.
Here are all the experiments in earth science. Earth science is the science of planet Earth. Earth science includes things like the atmosphere, weather, climate, oceans, geology and the water cycle. Water cycle in a jar. ... Also science fair projects and a teacher's guide.
Earth Science is the science of the study of the earth and it's components. Earth science, also called geosciences, encompasses all sciences that relate directly to the planet earth, including aspects of other science disciplines such as physics, mathematics, and chemistry.
This is a great hands-on geology experiment to teach earth science concepts. Discuss the different layers of the Earth. Assign a different color play dough to each layer and have kids build a section of the earth's layers. Provide a straw for kids to dip into the earth to retrieve a sample. Learn More: Homeschool-Rebecca Reid. 13. Solar ...
Our Earth science projects and Earth science experiments give inquisitive kids the opportunity to identify unknown minerals and discover why certain volcanic rocks can float. Our space science projects give students the chance to do everything from building a model rocket to determining the elliptical path of a planet's orbit using applied math.
Find earth and space science fair project ideas. Study astronomy, geology, weather, and more. Get ideas now to start your own science fair project! Explore our planet and beyond with these exciting science projects and experiments! Purify water using the sun, make a fossil cast, and more!