Get Your ALL ACCESS Shop Pass here →

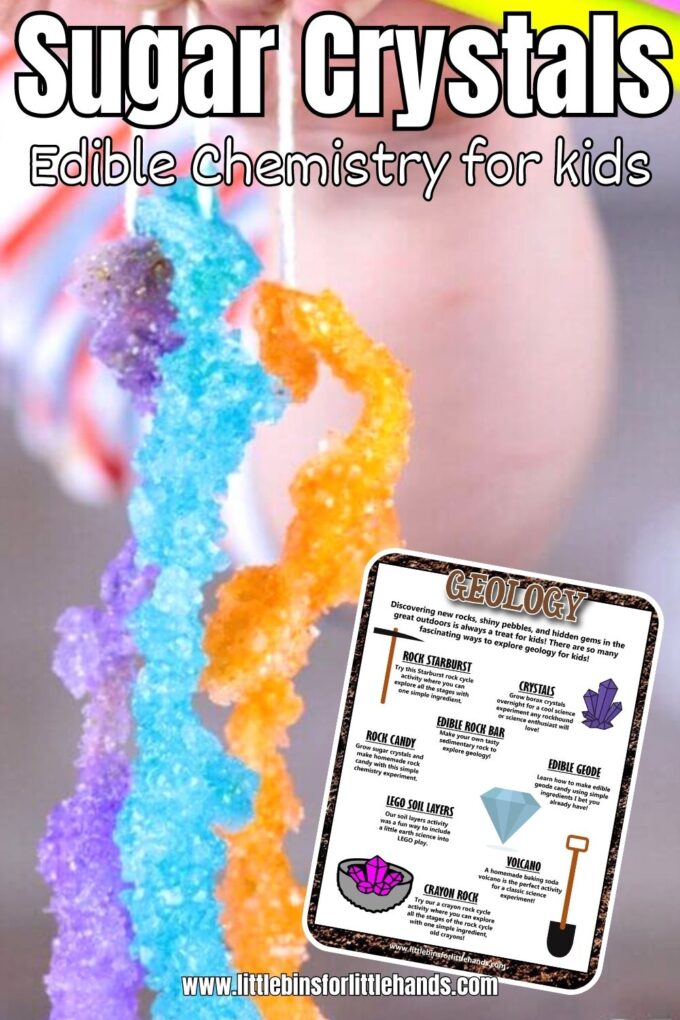
Sugar Crystal Experiment
This is an absolutely sweet science experiment! Grow sugar crystals and make homemade rock candy with this simple chemistry experiment. We can show you how to set up a science fair project to go along with it! Growing sugar crystals is a fun and easy science experiment for kids. .
Incredible Edible Science
Who doesn’t love science you can eat ? Grow sugar crystals for tasty chemistry , and the kids will have a blast learning all about crystals!
Crystal science has fascinated humans for thousands of years. Many of our precious gemstones are formations of crystal. Check out other crystal science projects like our salt crystals and borax crystals. You can also make edible rock candy geodes .
This sugar crystal experiment uses the same saturation principles and makes a saturated solution to form the crystals. Growing crystals is fun for kids and teaches them about solutions, molecular bonds, patterns, and energy. All from two ingredients: sugar and water!
Oh, and of course, you can incorporate it into a geology lesson , too!
💡 You can eat these crystals when you are done growing them, making it even more fun!
How to Grow Sugar Crystals
Why do we call chemistry experiments like this kitchen science ? It is because all the needed supplies come straight out of the kitchen. Easy!
Note: You will need to set aside 8+ days to complete this sugar crystal experiment.
- 1 cup water
- 4 cups sugar
- Edible glitter
- Food coloring
Also check out more fun ideas for mason jar science! Once you set up your sugar crystal experiment, try a few more quick science in a jar ideas!

HOW TO MAKE SUGAR CRYSTALS
STEP 1. The day before starting your sugar crystal experiment, cut a piece of string a little longer than your jars. Tie one end of the string to a straw. Tie a knot in the other end.
Get the strings wet and coat them in sugar. Let them dry overnight.

STEP 2. Add four cups of sugar and one cup of water to a saucepan the following day and heat until boiling. Heating the water to dissolve the sugar is the key to making your supersaturated solution.
Create the sugar solution: Heat water in a saucepan until it just begins to boil. Remove the saucepan from the heat. Add granulated sugar to the hot water, stirring continuously, until no more sugar dissolves. Keep adding sugar and stirring until you see some sugar settling at the bottom of the saucepan without dissolving further. This indicates that you have a saturated solution.
STEP 3. Pour your sugar mixture into the jars. Add edible food coloring to each jar and add some edible glitter.
STEP 4. Lower the string into the jar and place the jars in a safe place. Leave the sugar crystals to form for at least a week.

SUGAR CRYSTALS: DAY 8
Once the sugar crystals are as big as you want them, remove them from the sugar solution. Lay them on a paper towel or plate and let them dry for several hours.
Inspect the sugar crystals with a magnifying glass or microscope when they are dry . How are the crystals similar? How are they different? What can you see in the microscope or with a magnifying glass that you can’t see with your eyes?
Fabulous, edible science is at your fingertips when you explore science in the kitchen with your kids!

FREE Geology Activities Guide
Just because it’s food or candy doesn’t mean you can’t apply the scientific method .

Sugar Crystal Science Fair Projects
Science projects are an excellent way for older kids to show what they know about science. They can also be used in various environments, including classrooms, homeschooling, clubs, and groups.
💡 Kids can take everything they have learned about using the scientific method , stating a hypothesis, creating variables , and analyzing and presenting data.
Want to turn this sugar crystals experiment into a cool sugar crystallization science project? Check out these helpful resources below. Take a look at the science fair project outline below to get started.
- Science Project Tips From A Teacher
- Science Fair Board Ideas
- Easy Science Fair Projects
Sample Science Procedure to Grow Sugar Crystals:
- Begin the project by explaining what crystals are and the process of crystallization. Take a look at different examples of sugar crystals to learn more.
- Formulate a hypothesis. For example, “I predict that crystals will grow faster/bigger in a solution with more sugar.”
- Prepare the different containers for growing crystals according to the steps above.
- Encourage kids to set up multiple containers with different variables to test.
- a. Vary the sugar concentration in the solution (e.g., 1 cup sugar:1 cup water, 1 cup sugar:1/2 cup water, etc.).
- b. Compare different types of sugar (granulated sugar, powdered sugar, brown sugar).
- c. Test the effect of temperature by placing one container in the fridge and another in a warm place. d. Investigate the impact of time by checking the crystals’ growth at regular intervals (e.g., every day for a week).
- Have the kids observe the containers regularly and record them in a notebook. They should note changes in crystal size, shape, and formation patterns. Use our free science fair pack to help!
- Help the kids analyze their results and draw conclusions based on their observations.
- Discuss whether their hypotheses were supported and if they noticed any unexpected findings.
- Prepare a display board for the science fair, showcasing the experiment’s steps, observations, and results.
This project provides an excellent opportunity for kids to learn about the scientific method, observation, and the fascinating world of crystal formation while enjoying some sweet treats!
More Fun Edible Experiments
See if you can turn one of these science experiments into a science fair project!
- Strawberry DNA Extraction (not edible, but a great project)
- Make Edible Geodes
- Fizzing Lemonade
- Maple Syrup Snow Candy
- Homemade Butter
- Ice Cream In A Bag
Printable Science Projects For Kids
If you’re looking to grab all of our printable science projects in one convenient place plus exclusive worksheets and bonuses like a STEAM Project pack, our Science Project Pack is what you need! Over 300+ Pages!
- 90+ classic science activities with journal pages, supply lists, set up and process, and science information. NEW! Activity-specific observation pages!
- Best science practices posters and our original science method process folders for extra alternatives!
- Be a Collector activities pack introduces kids to the world of making collections through the eyes of a scientist. What will they collect first?
- Know the Words Science vocabulary pack includes flashcards, crosswords, and word searches that illuminate keywords in the experiments!
- My science journal writing prompts explore what it means to be a scientist!!
- Bonus STEAM Project Pack: Art meets science with doable projects!
- Bonus Quick Grab Packs for Biology, Earth Science, Chemistry, and Physics

- Pingback: 30 Incredible Chemistry Experiments - 123 Homeschool 4 Me
- Pingback: How to Make Rock Candy | CandyWarehouse Blog
- Pingback: Thanksgiving Lesson Plans for a Kid Friendly STEMs-Giving! | Little Bins for Little Hands
I am a librian and I just wanted to say that I love your website!! We have been doing take-home kits instead of in person youth programming due to COVID, and your STEM projects with explanations of the science are a real life-saver!
Love it! So happy to hear that we’ve been of help to you in these difficult times!
Comments are closed.

Subscribe to receive a free 5-Day STEM Challenge Guide
~ projects to try now ~.

Science Fun
Grow Rock Candy Crystal Science Experiment
In this fun and easy crystal science experiment, we’re going to grow rock candy crystals.
Note: Since hot water in involved, please insure adult supervision is utilized.
- Measuring cups
- Clean glass jar
- Butter knife or popsicle stick
- Rough string or yarn
- Microwave safe container
- Food coloring
Instructions:
- Tie a piece of the string to the center of the popsicle stick. Lay the popsicle stick across the top of the jar. Let the string hang down inside the jar. Make sure the string does not touch the side or bottom of the jar.
- Add three cups of sugar to the microwave safe container.
- Now add one cup of water to the sugar.
- Use the spoon to mix the sugar and water.
- With adult supervision, microwave the sugar and water mixture for two minutes.
- Have the adult remove the container and use the spoon to carefully stir the hot sugar water solution. Be careful to avoid splatters as the solution is very hot!
- Now have the adult microwave the solution for another two minutes.
- Have the adult carefully and gently stir the hot solution one more time.
- If you like, add several drops of food coloring at this time to give your candy some color.
- Carefully have the adult pour the sugar solution into the clean glass jar.
- Now dip the string into the solution for several moments and allow the string to absorb some of the sugar solution.
- Lay the string on the wax paper to dry. Be sure the strings lays perpendicular to the pencil and forms the shape of a T.
- Once dry, lower the string into the jar of sugar solution. The solution will have thickened so carefully work the string down into the solution.
- Place a paper towel over the top of the jar to keep out dust and debris and allow the string to remain in the solution for a week.
- Look at the string throughout the week and observe any changes.
- After a week, remove the string and enjoy your sugar rock crystal candy!
EXPLORE AWESOME SCIENCE EXPERIMENT VIDEOS!
How it Works:
The sugar dissolves in the heated water. As the solution cools, it becomes less able to hold the dissolved sugar. The sugar then clings to string and forms the rock candy crystals.
Make This A Science Project:
CAUTION: Do not eat – experiment making different solutions and record the rate at which crystals forms. Some ideas to test would be Epsom salts, Borax, and salt.
EXPLORE TONS OF FUN AND EASY SCIENCE EXPERIMENTS!
SUBSCRIBE AND NEVER MISS A NEW SCIENCE FUN VIDEO!
previous experiment
Next experiment.
Rock Candy Science Experiment: Step-by-Step How-To Guide
By: Author Hess UnAcademy Team
Posted on Last updated: September 18, 2023

Are you on the lookout for exciting and educational activities to enjoy with your curious little ones? Are your kids looking for a fun indoor activity that couples the wonders of science with the joys of eating? Well, we’ve got a treat for you—literally! A DIY rock candy science experiment is the perfect activity.
Homemade rock candy is a good example of a kid-friendly edible science experiment and it’s an example of an easy way to make homeschooling fun . It’s a fantastic hands-on activity that combines the joy of making delicious treats with the wonders of scientific discovery. Trust us, your kids will be buzzing with excitement, and you’ll be their official hero of the day!
Finding engaging and educational experiments can be a challenge. Sure, there’s no shortage of ideas out there, but finding the perfect balance between fun and learning can sometimes feel like searching for a needle in a haystack.
That’s why we’re share this rock candy science experiment—a delightful way to pique your child’s interest in science while indulging their sweet tooth.
Imagine watching your little ones’ eyes light up as they witness the magical transformation of simple ingredients into mouthwatering rock candy crystals. Not only will they be fascinated by the process, but they’ll also be absorbing essential scientific concepts without even realizing it. From crystallization to supersaturation, this experiment is a fantastic opportunity to spark their curiosity and set them on a path to becoming budding scientists.
Plus, let’s not forget about the joy of spending quality time with your kids. With the rock candy science experiment, you’ll be able to create lifelong memories as you bond over a shared love of exploration and delicious treats (adult supervision highly recommended). Whether it’s a rainy day activity or a weekend adventure, this experiment is sure to bring smiles, laughter, and a healthy dose of sugar-induced happiness to your household.
So, are you ready to dive into the captivating world of rock candy science? Stick around as we guide you through this step-by-step how-to guide, ensuring that you and your little scientists have a blast every step of the way. Get ready to transform ordinary sugar into a dazzling crystal creation that will not only satisfy their taste buds but also ignite their passion for learning. Let’s embark on this sweet journey together!
Easy Navigation
DIY Rock Candy Science Experiment
My kids have always loved eating rock candy, but it never occurred to me to let them make some themselves. But the other day, I got a text from my sister-in-law with pictures of my cute little niece and nephew enjoying their own homemade rock candy. My other sister-in-law responded saying how fun that looked and she’d like to try it with her own daughter.
My kids, of course, didn’t want to be left out and asked to make their own rock candy. And I, being the awesomely fantastic homeschooling mom that I am, told them I’d do them one better. I told them we could turn a homemade rock candy adventure into a full-on DIY homemade rock candy science project, with the scientific method and everything!
The kids were thrilled. Anything to get them another dose of sweets, am I right?
STEAM activities are very popular in our household as is, but this one, in particular, was especially fun.

This article may contain affiliate links. Please see our disclosure policy for more details.
DIY Homemade Rock Candy Science Project
Because we wanted to use this science project to teach our kids the scientific method, we started by gathering them all together and having them decide what they wanted to learn or discover. What questions did they want to ask?
If you turn this adventure into a science project, you’ll want your kids to come up with a couple of questions as well. I made these handy scientific method worksheets for you to print off and use if you want, or you can use a notebook.

These are some of our favorite printable worksheets for kids so don’t miss out!
A few examples of questions we gave our kids include:
- What happens when you put a string in a high sugar concentrated solution?
- If food coloring is added to the solution will it change the result?
- Can layers of color be made with the candy?
- Can you add flavors beyond the straight sugar?
- Will a Kool-Aid solution do both color and flavor?
- Can you do crystals in a spherical setting like a chocolate ball?
- Does the ball need to be turned or stationary in the crystallization process…which gives a better result?
- Can you make a stalagmite candy with the same concept only in reverse?
- Will the results change if I use powdered sugar or brown sugar instead of granulated sugar?
- Will the results change if the string or stick starts out wet vs dry?
- Will sugar crystals grow if I use a sugar-water solution that has not been boiled (supersaturated solution)?
These are of course merely examples. Let your kids get creative and exercise their scientific minds! And don’t worry if a few kids pick duplicate questions, or if everybody picks the same. The real lesson here is the process.
NOTE – We plan on continuing this experiment over the course of the next year or so, updating it periodically as we experiment with other questions.
Our kids decided to answer the following questions:
- Spencer wanted to know if he could make stalactites and stalagmites out of sugar crystals.
- Nicole wanted to experiment with flavors and see what the difference is between plain rock candy crystals and flavored. She made a plain solution and one with vanilla extract.
- Eugene was very confused about the whole process and couldn’t grasp what we were trying to do, so he asked the question, “Will sugar crystals grow better with a supersaturated solution made from boiling water, or with the same ratio of sugar to water, but without the boiling?”
- Jennifer wanted to experiment with kool-aid and wanted to see if mixing kool-aid in the sugar-water solution would make flavored and colored rock candy crystals.

Now let the experiment begin!
How To Make Homemade Rock Candy

Ingredients For Homemade Rock Candy
- 2 Cups of water
- 6 Cups of sugar (white, granulated) plus some spare
- Optional – Food coloring (2 drops of food coloring per jar/cup)
- Optional – Flavoring extract (1 tsp)
Other Needed Materials
- Clean containers such as cups or mason jars
- Something to grow sugar crystals on, such as some string or a wooden skewer
- Something to hold the thing your crystals form on away from sides of the jar and bottom of the jar, such as a pencil or some clothespins
- Mixing spoon

Instructions For Making Rock Candy
- Make sure you gather your tools beforehand. You don’t want to let your sugar solution cool before you are ready.
- Put each measuring cup of water in the pot and heat it to boiling. Make sure your pot has a lot of space because the solution will expand quite a bit.
- Once you have boiling water, begin adding granulated sugar a little at a time.
- Keep mixing and heating until the sugar is completely dissolved. This took us about 20 minutes.
- Once the sugar is dissolved, divide your supersaturated solution into each cup or glass jar.
- Add your flavoring and/or your coloring now! Not too much, and make sure you mix well.
- Dip your string or wooden skewer into the supersaturated solution. Anchor it to the top of the container somehow. We used a string and a paperclip. Make sure the string isn’t touching the sides of the jar or the bottom of the jar .
- Put your sugar-water solution somewhere safe to sit for a few days. Watch and wait for your sugar crystals to grow. These are your rock candy crystals.
- It is unclear how long you need to let your sugar crystals grow for. Some of our cups had crystals after 2 days, others still looked pitiful after an entire week. My dad says when he was a kid, they used to wait for a month. I would recommend using seed crystals by rolling your (wet) string or skewer in granulated sugar before putting it in your supersaturated solution and see if that speeds things up.
- Enjoy your delicious food science project of homemade rock candy.

Our Rock Candy Science Project Results
Spencer (age 10) asked the following question: Can I make stalagmites and stalactites out of sugar crystals by hanging an absorbent material from one cup of sugar solution to another?

THE RESULTS: Using a sugar to water ratio of 3:1 with a strip of cotton fabric did not create stalagmites or stalactites. The cotton strip did not absorb sugar solution fast enough to get it dripping. I wonder if a ratio of 2:1 would work better? It’s also possible the cups were not filled enough. We will try this again.
As you can see, he still got some great candy crystals out of the experiment, the solution just didn’t crawl up the cloth and make crystal drippings.
Nicole (age 9) asked the following question: Can I flavor my sugar crystals by adding vanilla extract right before letting the rock candy crystals grow?
THE RESULTS: Yes,adding about 1 tsp of vanilla extract to the sugar solution after it has been boiled added a nice vanilla flavoring to the finished rock candy. I wonder what other flavors I could make in the future?
Eugene (age 7) asked the following question: Can I make sugar crystals without boiling the water and sugar solution?

THE RESULTS: No, merely mixing water and sugar without boiling will not create an environment that sugar crystals can grow in. It is important to make a supersaturated solution by boiling the water with the sugar.
Jennifer (age 6) asked the following question: Can I use Kool-Aid (or powdered other drink mix) to change the color and the flavor of my rock candy at the same time?
THE RESULTS: Yes, Kool-Aid (or other powdered drink mixes) will change the color and the flavor of the rock candy, while still allowing sugar crystals to grow. I wonder what other things I could add to the sugar crystals, such as soda for example, without killing the crystals?
Rock Candy Science Fair Project Explained
If you want to use this experiment as a science fair project, or if you want to teach your kids the why behind the experiment, I’ve explained it below.
When you first combined the boiling water with the multiple cups of sugar, you created a supersaturated solution of sugar-water. When the sugar-water is supersaturated like this, the water can only properly mix with (and hold) the sugar when both are very hot (boiling water and sugar).
As the hot water begins to cool it can no longer hold the sugar so the supersaturated solution begins to separate and the sugar crystals begin to cling to your skewer or string.

The sugar molecules that were originally on the string/skewer will act as seed crystals, where more sugar molecules from the sugar solution will cling until sugar crystals begin to grow. Some crystal growth will even happen on the side of the jar.
Feel free to use this activity as a simple science fair project . Your peers will be impressed with this tasty scientific experiment.
Or if you’re looking for another fun science project idea, what about something involving the science of slime ?
Enjoy making your very own edible rock candy science experiment!
And remember to grab your free worksheets!

STEM Resources Delivered to Your Inbox Every Month

If you liked this edible STEM activity, you are going to love the STEM Made Easy Digital Subscription . Each month, you’ll receive 5 fully-planned STEM project guides along with worksheets and instructions for how to make them fun and engaging for kids ages 3-19. Check it out now !
Related Posts:
- Child-Friendly Learn To Crochet Tutorial
- Ridiculously Fun STEAM Activities For Older Kids
- STEAM Activities for Elementary Kids
- Halloween Science Experiments
- Easter Egg Dying Science Experiment
- Edible Stained Glass Craft for Kids

Homemade Rock Candy is science you can eat!
- Recent Posts
- Best Back-to-School Apps for Homeschool - August 12, 2024
- Free Back to School BINGO Printable - August 10, 2024
- Back-to-School Shopping Costs Families $369 More Than 15 Years Ago - August 9, 2024
ApRiL sChEeL
Monday 11th of October 2021
Hello. I am actually using this website for a science fair project.
Thursday 29th of February 2024
I am using this for the science fair!
Charlene Hess
That's great! I wish you luck in your science fair project!!
You have successfully subscribed to the newsletter
There was an error while trying to send your request. Please try again.
- svg]:fill-accent-900 [&>svg]:stroke-accent-900">
Stay-at-home science project: Grow your own rock candy
By Sandra Gutierrez G.
Posted on May 7, 2020 4:00 PM EDT
7 minute read
Welcome to PopSci’s at-home science projects series. On weekdays at noon, we’ll be posting new projects that use ingredients you can buy at the grocery store. Show us how it went by tagging your project on social media using #popsciprojects.
Any chef would agree that cooking is basically applied science and, unless you are an actual scientist working from home, your kitchen is the closest thing you’ve got to a lab. Following a recipe is essentially the same as running an experiment, and the best part is that you get to eat the delicious result. This project is no exception.
Making rock candy is easy—it only requires sugar, water, and patience. But if you don’t get your proportions right, you’ll be stuck waiting for crystals to form until the end of time. And that’s just sad.
Time: 30-40 minutes of prep, then up to two weeks of waiting
Difficulty: easy
What you’ll need
- 2 ½ cups of sugar
- 1 cup of water
- A pair of chopsticks (or any thin wooden stick)
- 2 (12-ounce) mason jars (or any heat-proof glass container with a similarly wide opening)
- Clothespins
- Paper towels
- (Optional) Food coloring of your choice
- (Optional) Food flavoring of your choice
Instructions
1. Bring the water to a boil . Needless to say, this step should be performed by an adult to avoid any burns. Once the first bubbles start to appear, turn the heat to low.
2. Pour the sugar in to create a supersaturated solution. Do it slowly and keep stirring until all the crystals have dissolved. Eventually, you’ll feel like you’re inhaling some of the sugar in the steam—keep going. They don’t call it supersaturated for nothing.
- Note: The amounts of water and sugar in this formula will be good for two rock candy sticks. If you want to make more, increase the quantities, making sure to maintain the same 2.5-to-1 ratio of sugar and water. This, as you’ll see later, is crucial.
3. Let your solution cool down to room temperature. You can leave it in the pot or pour it directly into the mason jars. Moving it to the jars will accelerate the cooling process.
4. (Optional) Add color and flavoring. If you want to give your rock candy some color, put a couple drops of food coloring into the solution and stir. How much you use will depend on how vibrant you want the color to be. This is also the time to add flavorings. Again, how much you use will depend on how intense you want the flavor to be.
- Note: If you want each piece of candy to be a different color or flavor, pour the solution into your mason jars and add the attributes of your choice to each one.
5. Wet your sticks. Separate your chopsticks and put them in a glass of water. How deep you’ll need to submerge them will depend on the size of your mason jars and the amount of solution you made. For 12-ounce jars, dunk your chopsticks up to a third of their length. Then, take them back out.
6. Dip the wet ends of your chopsticks in sugar. Pour some sugar on a plate and roll those sticks around in it. Make sure they pick up as many crystals as possible.
7. Let the chopsticks dry for a couple minutes. If you can, place them on top of something so the sugar-covered end stays in the air.
8. Prep your mason jars. If you haven’t already, pour any food coloring and flavoring into the mason jars and fill them with the sugar solution. Make sure each jar has enough to fully submerge the sugar-coated ends of your chopsticks. You won’t need the lid, but if it helps, twist the band shut to make the opening smaller.
9. Put one chopstick in each mason jar. The sugar-covered end should be totally submerged. Hold the clean end with your fingers and make sure the stick doesn’t touch the bottom or the walls of the jar. If it does, crystals will grow between the wood and the glass and good luck trying to get your candy out later. Secure it in place with a clothespin. Repeat this step for the second jar.
- Note: This is why the size of the jar’s opening matters. If it’s too wide, the clothespin will fall into the solution and the chopstick will rest against one of the sides of the jar. You definitely don’t want this. If you can’t find clothespins big enough, you can use two. We even tried tying a piece of yarn to the chopstick and keeping it in place by pulling it tight and securing both ends with the band. Reaching a balance is tricky though, since the chopstick will tend to lean to one side of the yarn, but it’ll do the trick in a pinch.
10. Cover your jars with paper towels. This is just to make sure nothing funky falls into your jar and gets fossilized in the sugar . Fold the paper towel in two and, using scissors, make a small cut in the center to put the chopstick through.
11. Wait. Growing rock candy is a slow process. You’ll start to see some crystals by day two, but they will reach their peak growth after two weeks.
12. Get your candy. Whenever you’re satisfied with the size of your rock candy, feel free to release it. Using a spoon, break the sugar layer on top and move the chopstick around to get it out. If for some reason there are crystals attaching the stick to the jar, an adult can use a knife to chisel it out carefully.
How it works
Water’s ability to dissolve sugar changes with temperature. That’s why if you pour two packets of sugar into a cup of hot tea, the crystals dissolve almost immediately. If you put it in a cup of iced tea, though, some crystals will sink to the bottom.
At room temperature, water is only capable of dissolving around 67 percent of the sugar you pour into it—that specific saturation at that particular temperature is thermodynamic equilibrium.
“When the concentration is less than 67 percent, any crystals you add to the solution will dissolve trying to reach thermodynamic equilibrium,” explains Richard W. Hartel, a food engineering professor in the food science department at the University of Wisconsin-Madison.
Room-temperature water with a sugar concentration any higher than that makes a supersaturated solution. We need that type of high concentration to grow our crystals. But in order for so little water to dissolve such a large amount of sugar (2.5 cups!) we need to boil the water first.
When the solution cools to room temperature, its sugar concentration will remain the same as when it was boiling—approximately 75 percent. At that point, sugar molecules in the solution will try to reach equilibrium by lowering the concentration to 67 percent. They do this by going back to their original state.
“In liquid form, the sugar molecules have a lot of energy as they bounce around. But when constrained in a crystal lattice, their energy is low,” says Hartel.
The sugar on your chopsticks makes it easier for crystals to grow around them, but (as you’ll see) they’ll also form on the walls of the mason jar and even on the very surface of the solution.
After about two weeks, when the sugar concentration has reached 67 percent, crystals will stop growing and your rock candy will be as big as it can be. Chisel those crystals like you’re unearthing an ancient treasure, and enjoy.
Latest in Projects
Don’t throw away your old sunglasses don’t throw away your old sunglasses.
By Debbie Wolfe
Teacher spends 1800 hours building the hovercraft of his childhood dreams Teacher spends 1800 hours building the hovercraft of his childhood dreams
By Keith Wagstaff
The Adventure Tower, located in the center of our building, is currently closed for routine maintenance and updates. We know the tower is a popular area for active exploration, so we're temporarily offering discounts as a thank you for understanding. Click here to learn more.
- Monday, Thursday, Friday from 9 am to 3 pm and Saturday, Sunday from 9 am to 5 pm
- Subscribe to Our Newsletter
- DIY Science
Rock Candy Chemistry: The Science Behind Crystallized Candy
- Exhibits + Activities
- Tickets + Pricing
- Planetarium
- Accessibility
- Directions + Building Maps
- Public Events
- Field Trips + Homeschool
- Private Event Rentals
- Become a Member
- Sponsorship + Corporate Giving
- Giving Impact
- Meet the Team
- Frequently Asked Questions
- In the Press
- Buy Tickets
- Subscribe to our newsletter
Monday, Thursday, Friday from 9am to 3pm
Saturday and Sunday from 9am to 5pm
Full Screen Modal Title
Search this site.
SEARCH RESULTS
By Carly Vaughn, Digital Marketing Manager

Did you know that candy-making is really just a tasty form of chemistry? Next time you bite into your favorite sweet treat, consider the time and scientific experimentation that went into creating a shelf-stable, packaged candy that not only stays fresh but tastes AMAZING.
Learn more about the science behind your favorite Halloween treats, and find out how to create candy experiments of your own at home!
In general, candy is made by dissolving sugar into water to create a solution. Granulated sugar, the most common type used in candy-making, is sucrose, a disaccharide molecule made up of glucose and fructose. When you force these two molecules to break apart, a very tasty reaction occurs: caramelization. The way that we force this reaction to occur is by adding heat into the mix when we try and dissolve sugar into water. Heating up the solution forces the sucrose molecules to break up and caramelize.
But when we do that, the sugar molecules really want to crystallize back into their solid form. Candy-makers use that crystallization process, and some strategic interference, to create the candies that we know and love.
The two basic categories of candy made this way:
- Crystalline candies like rock candy and fudge.
- Non-crystalline candies like caramels and marshmallows.
The key to mastering candy-making and creating amazing sweet treats is figuring out the concentration of sugar in your solution and the temperature that you need to heat it to. Lower concentrations of sugar are used with lower temperatures, since the more you heat your water the more sugar you can force to dissolved. Temperatures range anywhere from 223 degrees Fahrenheit to 350 degree Fahrenheit. Any higher and your sugar will burn (and taste bitter).
Itching to make your own candy at home? The most fun recipe to make is probably rock candy! Not only will you get to experiment with candy-making science, you’ll get to watch the formation of sugar crystals.
Homemade Rock Candy Experiment
Ingredients
- 2 cups water
- 6 cups granulated sugar
- Optional: 1/2 to 1 teaspoon flavoring extract or oil – feel free to get creative!
- Optional: food coloring – to give your candy a fun color
- 4 12-ounce jars or one quart-sized jar
- Cotton thread & pencils or 4 wooden skewers
- Candy thermometer
The Experiment
- Clean your jars with hot water.
- For each jar, cut a piece of string that’s a few inches longer that the height of your jar and tape it to a pencil. Position the pencil over the mouth of the jar and wind it until the end of the string is hanging about an inch from the bottom. If you’re using skewers, use a clothespin to hang it in the jar.
- Bring 2 cups of water to a boil over medium high heat, then add one cup of sugar. Stir until it dissolves completely. Repeat this step with all 6 cups of sugar to create a supersaturated liquid. If your sugar is not dissolving, raise the heat.
- Heat the sugar solution until it reaches 230 degrees Fahrenheit on your candy thermometer. This is called the “soft ball” stage in candy-making.
- Remove the solution from heat and add flavorings (no more than 1 teaspoon).
- Carefully wet the strings or skewers in your syrup and roll them in granulated sugar. This will be the base of the sugar crystals.
- Optional: Add 6-7 drops of food coloring to your jars.
- Pour the sugar solution into your jars, leaving some room at the top.
- Position your strings or skewers in the clean jars as outlined in step 2.
- Let your jars sit undisturbed for 3-5 days. Watch your jars as candy crystals form! Make sure you don’t jiggle your jars too much. For larger candy crystals, put your jars in a dark warm room (or the back of the pantry).
- Finally! It’s time to enjoy some tasty candy!
Did you try this experiment? Tell us your results!
- 4th of July
- Announcement
- Cooking Candy
- Early Explorers
- Endothermic
- Engineering
- Environment
- Experimentation
- For Preschoolers
- Galactic Gardens
- Marine Biology
- Math Moves!
- Mathematics
- Meteorology
- Outdoor Fun
- Pollinators
- Red-White—BOOM
- Solar Eclipse
- Special Events
- Storybook STEM
- Tinkering Garage
- Uncategorized
- Water Cycle
- Winter Wonders
RECENT POSTS

- February 2024
- January 2024
- October 2023
- February 2023
- August 2022
- February 2022
- December 2021
- October 2021
- February 2021
- September 2020
- October 2019
- September 2019
- January 2019
- December 2018
- October 2018
- September 2018
- August 2018
- February 2018
- January 2018
- December 2017
- November 2017
- November 2015
- October 2015
- September 2015
- August 2015
- Privacy Policy
- March 2021 3
- February 2021 15
- January 2021 12
- October 2020 34
- September 2020 17
- August 2020 16
- July 2020 30
- March 2020 5
- February 2020 13
- December 2019 14
- November 2019 21
- October 2019 15
- September 2019 3
- August 2019 21
- July 2019 5
- June 2019 18
- April 2019 6
- March 2019 14
- February 2019 18
- January 2019 7
- December 2018 12
- November 2018 8
- August 2018 3
- July 2018 17
- April 2018 17
- March 2018 15
- February 2018 2
- January 2018 3
- December 2017 7
- November 2017 5
- August 2017 2
- July 2017 3
- April 2017 3
- February 2017 5
- October 2016 1
- September 2016 2
- April 2016 1
- February 2016 1
- June 2014 4
- February 2014 4
- December 2013 1
- November 2013 2
- October 2013 1
- September 2013 3
- July 2013 3
- April 2013 1
- January 2013 2
- November 2012 1
- September 2012 1
- August 2012 2
- March 2012 1
Report Abuse

Growing A Jeweled Rose
- WAYS TO PLAY
- _Glowing Play
- _Sensory Play
- _Baby & Toddler Play
- _Preschool Play
- SEASONAL PLAY
- _Valentine's Day
- _St. Patrick's Day
- _4th of July
- _Thanksgiving
Rock Candy Experiment

ROCK CANDY EXPERIMENT FOR KIDS
- 2-3 cups of sugar
- 1 cup of water
- A jar or glass
- A large saucepan
- Clothespins
- Food coloring
- Candy flavoring
- Combine equal parts of sugar and water in a saucepan and heat until all of the sugar is dissolved.

- Then, slowly add more sugar and mix, slowly adding more sugar and mixing until the sugar will no longer dissolve in the water.

- The water should start to look a little cloudy . That is when you know that no more sugar is dissolving and the perfect sugar-saturation has been reached.
- The short version is that you are creating a saturated sugar solution, or a solution in which no more sugar can dissolve at a particular temperature.
- The amount of sugar verses water used should be roughly 3:1 . You can easily double & triple the recipe as long as you mantain a 3:1 ratio.
- Add candy flavoring if desired, and then continue to heat the water until it comes to a simmer.
- Remove the sugar-water from the heat and allow it to cool.
- Cut the skewers to a desirable size for the jar(s) that you are using. Then, dip the sticks in water and roll them in sugar.

- Set the sugar-coated sticks aside and allow them to dry.
- Once your sugar-water is cool enough pour it into jars, using one jar for each color of rock candy that you wish to make.
- Once the sticks are dry carefully place them into the jar(s).

- You want to make sure that the sugar-coated sticks are completely dry before placing them in the jars.
- The rock candy needs the sugar on the sticks to grow, and if the sugar isn't dry it will dissolve in the water.
- It is also important to make sure that the sticks are not touching the bottom or sides of the jar.

- After day three we could really see growth!

- By day 5 my girls were dying to actually eat rock candy , haha. But, this was a great lesson in patience.

- After a week our rock candy was almost ready! Just look at those beautiful jars!

- After a week your rock candy can be removed from the jars and enjoyed.
- You can extend the fun and grow your rock candy longer if desired.
- Once you and the kids are ready remove the candy sticks from the jar(s), and then place them on a clean surface to dry.
- Once dry you will have a yummy treat to enjoy!
- Rock Candy: What's Going On?
- Sugary Secrets: Candy Making Chemistry
- The Sweet Science of Candy Making

Growing a Jeweled Rose is a site packed with fun and educational activities for kids. Read more about us or catch up with our favorite posts .

More About the Author
Crystal Underwood is the writer and creator of Growing A Jeweled Rose. She has worked extensively with children and strongly believes in the importance of play at the core of early learning. She is passionate about the early years and believes that childhood should be a truly magical time in life. For all the best kids activities connect with Growing a Jeweled Rose below!

you may also like

Snow Paint Recipe

No-Cook Cinnamon Ornaments
- Skip to primary navigation
- Skip to main content
- Skip to primary sidebar

- FREE Experiments
- Kitchen Science
- Climate Change
- Egg Experiments
- Fairy Tale Science
- Edible Science
- Human Health
- Inspirational Women
- Forces and Motion
- Science Fair Projects
- STEM Challenges
- Science Sparks Books
- Contact Science Sparks
- Science Resources for Home and School
Rock Candy Recipe
December 12, 2011 By Emma Vanstone 26 Comments
The first thing I have to say about this activity is that it’s sticky, messy and doesn’t always work, but when it does, it’s pretty amazing. Our rock candy recipe has been perfected from many, many attempts to get it to work, so hopefully, we’ve done most of the hard work for you.
The first time we tried, nothing grew at all as the solution wasn’t concentrated enough, the second time, we made it too concentrated, and the whole solution crystallised. The third time it worked!!

3 cups of caster sugar
1 cup of water
A lolly stick, wooden stick or circle of wire/string
Some sparkles and/or food colouring ( optional )

How to make your own rock candy
Heat the water in a pan and add the sugar slowly, stirring continuously.
Keep adding sugar until no more will dissolve, and then remove the heat and leave to cool for about 5 minutes. If you can get a bit more sugar to dissolve, then that’s a good thing. You want a saturated solution .
Pour the solution into a glass jar and suspend the lolly stick, we used some sellotape to hold it in place. Don’t let it touch the bottom or the sides of the jar.
Alternatively, you could tie some string to a pencil and rest the pencil on top of the jar with the string hanging in the jar.
You should see crystals start to form after a few days.
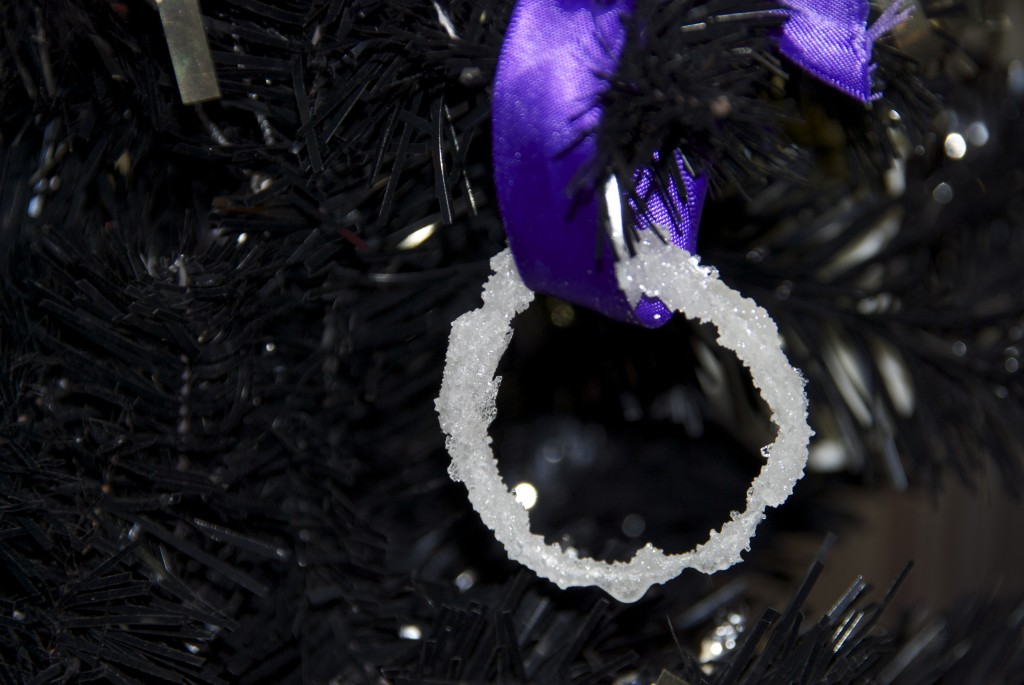
We made a lolly and a circle to hang on the Christmas tree. I was a bit disappointed with the circle, but we will be trying again with a star!
Why does sugar crystallise?
A crystal is a solid material with a naturally geometrically regular form. Some take millions of years to form, such as diamonds. The sugar crystals we made above take just a few days.
Most minerals dissolved in water will form crystals given enough time and space. The shape of the crystal formed depends on the mineral’s molecule shape.
In the case of our sugar crystals, there are two processes at work.
Evaporation – the water evaporates slowly, meaning the solution becomes more saturated, so the sugar molecules come out of the solution and collect on the string/wire or stick.
Precipitation – the solution we made was very concentrated, which means there was too much solute to remain dissolved in the water, therefore it starts to precipitate.
What is a saturated solution?
A saturated solution is a solution that won’t dissolve any more solute at that temperature. Our water and sugar solution was saturated when no more sugar would dissolve.
What is a solute?
A solute is a solid being dissolved. When making rock candy , sugar is the solute, and water is the solvent .
What is a solvent?
This is the liquid the solute is being dissolved into.
What is a solution?
This is what we call a solute and solvent .
If you enjoyed this activity, you’ll love my other candy science experiments !

Last Updated on February 20, 2023 by Emma Vanstone
Safety Notice
Science Sparks ( Wild Sparks Enterprises Ltd ) are not liable for the actions of activity of any person who uses the information in this resource or in any of the suggested further resources. Science Sparks assume no liability with regard to injuries or damage to property that may occur as a result of using the information and carrying out the practical activities contained in this resource or in any of the suggested further resources.
These activities are designed to be carried out by children working with a parent, guardian or other appropriate adult. The adult involved is fully responsible for ensuring that the activities are carried out safely.
Reader Interactions
December 12, 2011 at 1:23 pm
This is amazing! such a genius idea!!!! I might even try and convince husband to give it a go…baby still too little for this.
December 14, 2011 at 9:40 pm
Fun for adults too!
December 12, 2011 at 1:29 pm
ooh I love this. Definitely going to try it with my little ones. Thanks for sharing. x
Thank you, good luck with it x
December 12, 2011 at 4:33 pm
wow how beautiful and magical. i guess xmas at your house will be a ‘bomb’, lol
December 12, 2011 at 6:15 pm
How cool is that?? Your kids must love being your kids!
December 14, 2011 at 9:39 pm
Ahhh, thank you. I do try hard. xx
December 12, 2011 at 8:31 pm
Too cool! We just read a book about these being the entry for a Science Fair! It’s called My Blue Ribbon Day (or The Blue Ribbon Day). We’ll definitely have to try these sometime!
December 12, 2011 at 8:54 pm
These are amazing!!
Thank you. xx
December 13, 2011 at 5:00 am
Awesome idea and for an ornament too!
December 14, 2011 at 9:38 pm
awww, thanks. xx
December 13, 2011 at 3:39 pm
That is really cool!
Thank you. x
December 15, 2011 at 5:10 am
Love this idea! My boys will have tons of fun with this. So glad I found your blog (through ABC & 123) – I’m a new follower.
December 15, 2011 at 9:17 am
So glad you liked it. x
December 16, 2011 at 6:05 am
this is so cool! I’d love you to add this to my What We Wore and Made Party over at http://raegunwear.blogspot.com/search/label/WWWMW
December 16, 2011 at 9:19 am
Hi! I think that this is just great! I would LOVE for you to stop in and link this up in my Homeschooling on the Cheap! Link up. It is fairly new and I post it every Thursday. IT stays up all week. I’m looking for ideas on things homeschoolers can do. This looks like something for sure!
Thank you, Kelli http://3boysandadog.com/deals/2011/homeschooling-on-the-cheap-12152011/
December 16, 2011 at 9:35 am
They look great, especially with the pink. I’m a very impatient person but still I might try to make this 😉
December 18, 2011 at 9:32 pm
We’ve had the worst time trying to grow sugar crystals! I’m glad you finally managed it 🙂
December 18, 2011 at 9:47 pm
This is amazing!! What a cool, cool activity!!! We are definitely going to be trying this!!! I am your newest follower! I’d love for you to follow me back, if you want to =) I also wanted to invite you to link up to TGIF Linky Party – http://livinglifeintentionally.blogspot.com/search/label/Linkey%20Parties – I know my readers would love this!! Merry Christmas, Beth
January 07, 2012 at 3:49 pm
My daughter approves of the one that looks like a bracelet!
Thanks for linking up to Science Sunday (yes I am this late on commenting).
November 28, 2012 at 4:31 pm
My kids have brought these home with the yoghurt pot and lollipop stick before.I’ll have to get them to try making a bracelet.
November 28, 2012 at 5:19 pm
Fantastic! What a perfect Christmas Science Craft.
Thanks for sharing on Kids Get Crafty!
December 01, 2012 at 10:21 pm
My kids would be beyond excited to make their own candy. And this is such as simple recipe!
December 03, 2012 at 9:47 am
is it simple, although it did take us a few goes!
Leave a Reply Cancel reply
Your email address will not be published. Required fields are marked *
- Skip to primary navigation
- Skip to main content
- Skip to primary sidebar
- Skip to footer
We are not Martha
- Where I've Been
Apr 19, 2021 · Modified: Jul 16, 2021 by Sues · This post may contain affiliate links, uses cookies, and generates income via ads · View privacy policy + disclosure statement linked in footer · 91 Comments
How to Make Rock Candy
Homemade rock candy is easy to make! It simply requires a little bit of patience and a whole lot of sugar. Whether you're making the sweet treat to enjoy for dessert or as a science experiment to do with your kids, you'll be amazed at how fun DIY rock candy is.

This post was first published in August 2011, but has been updated with much improved instructions and new photos in 2021.
So, you want to make your own rock candy? Yay! I first wrote this tutorial back in 2011 when I decided I wanted to make rock candy as table decor for my wedding.
Well, let's just say once I attempted actually making rock candy I realized that was not going to happen for several reasons:
- Rock candy requires A LOT of sugar to make. If I wanted 200 sticks of rock candy, it would take about 200 cups of sugar (that's if I re-used each sugar solution one time).
- Rock candy requires time and patience to make. In the quantities I wanted, I should have started making my rock candy at least a year in advance and would have been working on it nearly every day during that time.
- I'd have to live with mason jars of rock candy growing all over my (at the time) tiny apartment.
Needless to say, I did not make rock candy for my wedding.
But 10 years later, I've decided to update this post because my initial rock candy instructions were not that great- I shared my experience with you, but my results weren't ideal.
I've recently started making rock candy again and now have a process down that should work for everyone!
I've also included lots of FAQs that I've received over the years, along with some tips and tricks to make DIY rock candy making easier for you.
What is Rock Candy?
Rock candy is sometimes called "sugar candy" and for good reason! It's actually made completely of large sugar crystals. It often comes in pretty colors and is sold in all kinds of candy stores.
If you've ever made simple syrup before, making rock candy is similar... Except you'll oversaturate the syrup solution (AKA add too much sugar to it) and then let it cool and rest so sugar crystals can form.
Because the solution is supersaturated, that means it can't possibly absorb the sugar at the cooler temperature. Therefore, as the solution cools, it becomes unstable and all the sugar can't stay in the liquid, so it attaches itself to the skewer.
Why Should I Make My Own?
Of course you can easily purchase rock candy in a store or online, but making your own is fun. Whether you want to enjoy it yourself or give it out as gifts, it's easy to do. But if you need it in bulk for wedding decor, you'll want to plan VERY well in advance!
Another reason to make your own rock candy is because it's a great science experiment. You and your kids can learn all about the process of crystallization and different saturations of solutions.
Also, rock candy makes for super fun cocktails (you can also make fun mocktails for your kids)!
In conjunction with making rock candy, you may also want to try making other candies, like homemade fudge and gummy candy. Here's a great guide to sugar chemistry .
How Long Does it Take to Make?
The solution for rock candy is really easy to make and doesn't take long at all. BUT once you make the solution, you need to let it sit for 6-7 days so the crystals can form.
So, yes you need some patience. But it's also fun because you can check on your jars every day to see how your crystals are growing!
Equipment Needed
You may already have everything you need to make your own rock candy as it only requires a couple simple ingredients and a few household items. Here's what you need:
- Granulated Sugar (for 5 sticks of candy, you'll need 10 cups)
- Food coloring (if you want to add color to your candy)
- Mason jars or other receptacles to hold sugar solution. I recommend a standard 16 oz. mason jar .
- Skewers or sticks to make rock candy on. I use a simple wooden kabob skewer . But you can actually buy rock candy sticks to use for a more professional look.
- Clothespins or chip clips to balance stick on jar (you can't let the stick touch the bottom of the jar).
This "recipe" will make 5 sticks of rock candy. Since the candy will all grow in separate jars, you can make a variety of colors with this one recipe. I like to keep at least one jar clear as it's the easiest to be able to monitor growth!
To start, you need to coat your skewers or sticks in granulated sugar. The purpose of this is to "seed" the rock candy and give the crystals something to adhere to as they start to grow.
I trim my skewers a bit before using them since they're pretty long and have a pointy sharp end.
Submerge the skewers in water, coat them in sugar, and then set out to dry.
I like to do this a day ahead of time, but as long as you let them dry for an hour, they should be fine.

The next step is to prep your jars so that the process is easy once you make your sugar solution.
Make sure your jars are clean and not cold (I recommend running hot water through them before using). Attach a clothespin or chip clip to each skewer and then balance over the top of jars.
Be sure your skewer is hanging about an inch from the bottom of the jar as the rock candy crystals will stick to the bottom of the jar and will make it tough to remove skewers.

Set it all up, but then take the skewer out of the jar- you'll add it back in once your sugar solution is in.
Now it's time to make the sugar solution. Add 4 cups of water to a large saucepan. Bring to a boil and then start adding sugar in one cup at a time, stirring with a wooden spoon and letting each cup fully dissolve before adding the next.
You'll notice it becomes harder and harder for the sugar to dissolve as you add more in and the sugar will start to clump before dissolving, like this:

That means your solution is supersaturated and you should have no problem growing crystals. Woo hoo!
Once your final cup of sugar has been dissolved, let mixture simmer for about 5 minutes before removing from heat.
Remove the saucepan from the heat and let the mixture rest for about 15 minutes.

Now, divide the mixture between your 5 prepared jars. And stir in your food coloring at this time.
I highly recommend bringing your jars to where they'll be resting for the next 6-7 days before you place the skewer in the jar. Be sure to use caution when moving the jars as they will be very, very hot.
Once the jars are in their resting spots, place prepared skewers into solution. You'll want to try your best not to move jars around much once skewers are in place.

Now comes the tough part... Waiting for your rock candy to grow!
Luckily, things will start happening fairly quickly and you should see crystals starting to grow on your sticks within a day. Here's how mine looked after 24 hours:

Here they are after 48 hours:

And here they are after 72 hours:

You can remove the skewers from the jars whenever you want, but I recommend giving them at least 6 days to fully form.
When you're ready to remove rock candy sticks from jars, use your finger to gently crack the hardened sugar on top of the jar and gently wiggle the stick to release. Like this:
Let the syrup drizzle from stick. I recommend setting the candy over an empty jar or bowl to let it drip or placing it on a paper towel.
Then you're ready to enjoy your incredible homemade rock candy!

How cool is that??
Can I Re-Use Sugar Solution?
I got a lot of questions about this on my previous post, so I decided to do a little experimenting this time around.
Once you take the sticks out of your jars, you'll likely feel wasteful pouring the rest of the sugar solution in the trash. So, can you re-use it? The short answer is yes!
But before you just plop another sugar-coated stick in the solution, I recommend that you pour it back into a saucepan and bring it back to a boil. Add another ¼ cup sugar in it and let it simmer for a few minutes. Then pour it back in the jar.
I re-used a couple of my solutions without re-heating and adding more sugar to the solution and here's how they came out after a week:

Here's what happened when I did re-heat and add an additional ¼ cup sugar:

That's some definite proof that you'll want to re-boil the solution and add more sugar!
Why Isn't My Rock Candy Growing?
Great question! Making rock candy can be a bit finicky and there are lots of reasons it may not work on your first try. However, if you follow these instructions closely and use the full 10 cups of sugar in 4 cups of water, you should have a supersaturated solution and your chances of it working are high.
If your sticks don't seem to have crystals growing at all after a few days, it may because your sugar solution wasn't oversaturated for whatever reason. In that case, you can put the mixture back into the saucepan, bring it to a boil and add in another cup of sugar. Stir to dissolve. Add more sugar in if the first cup dissolved easily.
You'll want to use new sugar-coated skewers, too.
I went through this process the first time I made rock candy and had a fail and it definitely seemed to help as crystals started growing after I did it.
Also be sure to double-check that your jars are clean and not cold and that you didn't move your jars around once you added the stick in.

How Can I Make Rock Candy Fast?
Unfortunately, there isn't really a way to make rock candy grow quickly. I have heard that putting the jars in the fridge will speed up the process a bit, but I haven't tried this myself.
You can take your rock candy out of the jar after just a couple days, but your sticks will probably be a bit sparse.
How to Store Candy
Store your rock candy in a cool dry place. If you're planning on keeping it for a while or giving it as gifts, I recommend wrapping them in cellophane wrappers, like these .
When stored properly, your rock candy should stay good for a year.

Helpful Tip & Tricks
Once you have the process down and understand the science behind it, making your own rock candy is super simple! But I do have some tips and tricks that should help you troubleshoot if you're having problems:
- Make sure your mason jars are completely clean and not cold. I store a lot of my mason jars in my basement (which is chilly), so I always clean them out with hot water before using them.
- Do not skip the step of coating your sticks in sugar. It's very important that the crystals have something to adhere to as they grow (otherwise they'll likely just grow to the bottom of the jar).
- I recommend using a concentrated food coloring or gel to ensure that you can add enough color without adding too much liquid to the solution. These are my favorite colors (they're not gel, but are very saturated).
- I recommend making the color a bit darker than you think you should as it will look lighter once the crystals form.
- You can add flavoring to the rock candy if you want, but similarly to using food coloring, try to use a concentrated flavoring so you don't have to add too much liquid to get the flavor level you want.
- Once you've poured your sugar mixture and placed your sticks in the jars, take care not to move them or jostle the sticks.
As you can see, DIY rock candy is pretty easy to make as long as long as you understand the process. It mostly just requires patience... And a whole lot of sugar!

After making rock candy at home, I have a whole new appreciation for the candy and can certainly understand why a company may charge top dollar for it (though I'm sure the use of machinery makes it much easier!).
Don't forget to check out my recipe for rock candy cocktails if you're looking for a fun way to utilize your candy!
Have you ever made your own rock candy at home?

DIY Rock Candy
Ingredients.
- 5 wooden skewers
- 5 mason jars (I recommend 16 oz)
- 5 clothespins or chip clips
- 4 cups water
- 10 cups granulated sugar, plus more for coating skewers
- Food coloring
Instructions
- Submerge skewers in water, coat them in sugar, and then set out to dry. I like to do this a day ahead of time, but as long as you let them dry for an hour, they should be fine.
- Make sure your jars are clean and not cold (run hot water through them if necessary). Attach a clothespin or chip clip to the top of each skewer and then balance over the top of jars. Be sure your skewer is hanging about an inch from the bottom of the jar as the rock candy crystals will stick to the bottom of the jar and will make it tough to remove skewers.
- In a large saucepan, bring water to a boil. Add sugar in one cup at a time, stirring with a wooden spoon and letting each cup fully dissolve before adding the next. You'll notice it becomes harder and harder for the sugar to dissolve as you add more in.
- Once your final cup of sugar has been dissolved, let mixture simmer for about 5 minutes before removing from heat. Let mixture rest off the heat for about 15 minutes.
- Divide sugar solution amongst the 5 prepared jars. Stir in food coloring at this time. I recommend bringing your jars to where they'll be resting for the next 6-7 days at this time. Be sure to use caution as the jars will be very hot. Once they're in their resting spots, place prepared skewers into solution. You'll want to try your best not to move jars around much once skewers are in place.
- You'll likely see little crystals forming within hours, but you'll want to let the jars rest for 6-7 days to let sugar crystals fully form.
- When ready to remove rock candy sticks from jars, use your finger or a fork to gently crack the hardened sugar on top of the jar and gently wiggle the stick to release. Let solution drizzle from stick (I recommend setting the candy over an empty jar or bowl to let it drip) before enjoying the candy.
- If you want to re-use the sugar solution to make more rock candy, pour solution into saucepan and bring to a boil (you can add any sugar crystals that have already formed, but if you can't get them all, simply clean them out of the jar before re-using). Add in an additional ¼ cup of sugar and let simmer for a couple minutes. Remove from heat and let cool for 10 minutes before pouring into a clean jar.
Useful Products

More Dessert Recipes

Reader Interactions
Kate Deeks says
August 17, 2011 at 7:50 pm
Ha! I loved the rock-candy camera setting. Would love to make crystals, but not so interested in the candy eating. Sounds like a fun experiment.
vanillasugarblog says
August 17, 2011 at 7:53 pm
remember as a kid how much we loved having these? i was horrid at making caramel until I finally got a good thermo and MADE myself set up camp at the stove to babysit the caramel.
lynn @ the actor's diet says
August 17, 2011 at 7:55 pm
i remember them making this (and peanut brittle) in science class. i was so jealous of those kids!
August 17, 2011 at 8:41 pm
Rock candy is so pretty! I made it once when I was a kid and a trail of ants found their way to it from under my back door.
August 17, 2011 at 8:43 pm
sue, this is very pretty, it's a piece of art. just like clusters of crystals !! It's amazing to know just by boiling sugar syrup can form into these. oh, just voted for your site. Have a happy day!
August 17, 2011 at 9:25 pm
wedding rock candy...what a cute idea! you could have jars of rock candy forming all over your house haha 🙂
August 17, 2011 at 9:26 pm
I only have about 65 peeps coming to my wedding. I might be able to make this happen! Thanks for the inspiration!!!
August 17, 2011 at 9:34 pm
Congrats! I will go vote now! I had no idea making rock candy was such a process! The results are so pretty! I def do not have the patience
August 17, 2011 at 10:56 pm
Hi Susie! You and Chris looked like you at least enjoyed making these! And they are so pretty. I just voted for your website, and will return tomorrow to do it again!!
Lauren at Keep It Sweet says
August 18, 2011 at 7:10 am
OMG, so much fun! This would completely make me feel like a kid:-)
Joanne says
August 18, 2011 at 7:26 am
Wow who knew that making rock candy was such an ordeal! But totally worth it for a once-in-a-lifetime experience.
Jenn's Food Journey says
August 18, 2011 at 8:45 am
I made rock candy once when I was about 12!! lol Your post brings back great memories of that!! And they look beautiful 🙂 Congrats on being nominated.. I'm going to vote for your ladies right now!
newlywed says
August 18, 2011 at 10:01 am
Well, it sure looks great! I had DIY-fever for my wedding too. Then I woke up one day and remembered how much I hate crafts. And bought everything. Except for the favors, which I cooked with my mom...because at least I like cooking!
Emily @ A Cambridge Story says
August 18, 2011 at 10:07 am
You definitely make this look easy - who knew that rock candy had to "grow". It probably is a little untenable for homemade wedding favors but I'm really impressed that you did this!
Erica @ In and Around Town says
August 18, 2011 at 10:46 am
Totally did this in 3rd grade science, but think I need to do this again! So much fun 🙂 Congrats on the nomination!
August 18, 2011 at 11:03 am
I think your photos look great! Also, it was interesting to read about your experience making rock candy, I didn't realize it was such a simple process, but with such varied results! Very cool.
August 18, 2011 at 11:08 am
I just bought Sugarbaby and have been planning to try the rock candy recipe just for fun. There's a suggestion in there to use toothpicks and make mini rock candy... which could speed things up if you haven't completely given up on making your own for your wedding.
August 18, 2011 at 12:31 pm
Yumm! I never successfully made rock candy as a child, not convinced I'd be too good at it as an adult either though... haha
Michelle Collins says
August 18, 2011 at 1:30 pm
Congrats on the nomination!
CookiePie says
August 18, 2011 at 1:55 pm
WOW - homemade rock candy - that is amazing! For your wedding, you can show everyone the pictures of your beautiful rock candy 🙂
5 Star Foodie says
August 18, 2011 at 8:34 pm
How fun to make this at home, very neat!
Shannon says
August 19, 2011 at 12:12 pm
how fun!! that is awesome 🙂
Andrea Kazilionis says
August 19, 2011 at 8:26 pm
So excited about this post! I can't wait to try this kitchen science project and enjoy the delicious outcome...!
Kerstin says
August 21, 2011 at 11:34 pm
What a fun post - I had no idea how to make rock candy! Great wedding favor idea too 🙂
August 22, 2011 at 3:49 pm
Looks great! Can't imagine making 200 of those! Man, that is a lot of sugar for so few sticks!!
Elina (Healthy and Sane) says
August 25, 2011 at 5:36 pm
Obviously you're not going to make these for the wedding but at least you now know how to make them (I love discovering such things). Awesome little project! 🙂
Rozzie says
August 31, 2011 at 4:06 pm
Wonderful post! Great to see the photos in progress and your commentary was awesome. Thanks for sharing.
Dorcas says
September 24, 2011 at 3:04 pm
Ironically I had actually planned on trying this tomorrow. Last night I was looking something else up in my Joy of Cooking and thought it'd be really cool to try. I'm so glad I saw your blog because I'm going to do more investigating before I begin. My book says to take a disposable square 8" aluminum pan, punch 7-8 holes 1/2" up on two opposite sides. Then lace string back and forth. Then you pour sugar mixture (boiled to 250- hard ball stage) over string. String will be immersed. Then cover pan & leave undisturbed 36-48 hours at least. Then wait some more until it's all crystalized. Cut strings and lift it out of pan. (I guess it's solid now - idk) put on baking sheet in 200 degree oven to dry. Says to use strings as decoration or knock crystals off. Store in air tight container at room temp. Usage idea- pile crystals high in bowl at party for fancy sugar for coffee. I didn't copy recipe here. Just gave you the highlights. As you can imagine I now have a headache. Lol. You used 3.5 cups of sugar. Mine is 2.5 cups sugar, 1cup water and a pinch of Cream of Tartar.
simone says
October 28, 2011 at 9:58 am
Featured you in our Food Trends article this week! Looks delicious and gorgeous.
November 13, 2011 at 8:21 pm
I have had varied luck over the last few years, making rock candy. Like yours, some stuck to the stick, some turned to a huge blob in the bottom of the jar. Luckily for me, I was making them to tie onto Christmas packages, and not for a wedding, or the pressure would have gotten to me! I ordered candy flavorings, and added it to my sugar solutions. Then co-ordinated it with the color-mint or irish cream went with green, for example. These were made to use for stirring coffee, sweetening it, and giving it some specialty flavors! A great gift in itself. If you have serious coffee drinkers on your list!
Charles says
November 19, 2011 at 12:47 pm
my took 4 months...for one crystal to grow on it (:
Charlie says
December 04, 2011 at 9:52 pm
This would be a great Girl Scout troop project!
MYT CR8TiV says
March 06, 2012 at 10:22 pm
I made these in Science class when I was a kid. We used Hard Candy Flavoring drops to enhance the taste. You could use those so it doesn't just taste like bland crystallized sugar.
May 02, 2012 at 11:11 pm
I just had to do a chemistry experiment dealing with recrystalization. We did the same process of boiling the water and sugar to supersaturate it, after it was completely mixed we placed the beaker in an ice bath and the crystals automatically formed. I wonder if that process would work to speed up the rock candy process.
Dakota says
June 25, 2012 at 6:25 pm
Thanks, this'll be great to try! I heard that you can flavor them with flavoring oil/extract, im not sure if I could stand pure sugar on a stick. 🙂
August 09, 2012 at 1:15 pm
I loveee this site! I'm using rock candy in my wedding too, Purple and White Rock Candy in a vase to make a "bouquet". I've searched online for some to buy, but it is kind of expenses so I thought I would try to make my own. Sounds easy, right? HA! 🙂
Jacob Crim says
October 19, 2012 at 10:34 am
Could I pour the liquid into a baking sheet then break it up once its dried? I am trying to make "blue meth" like in Breaking Bad for my Halloween costume.
October 20, 2012 at 10:40 am
@Jacob- You could try! As you saw, making this wasn't exactly easy for me... So I'd try a few batches now and hopefully one will be ready in time 🙂
A.L. Designs Jewelry says
December 12, 2012 at 8:54 am
Look so fun and yummy 🙂
January 19, 2013 at 3:25 pm
Just a thought in candy making. I was always told to making candy on sunny days. Candy wont set up if not. I know this is true for fudge, and would make sense for this as well.
VinPro elegance says
May 09, 2013 at 9:28 pm
Thanks!!Thanks, great to try!
Fattaneh says
September 26, 2013 at 12:31 am
Thanks for sharing your experience! I'm gonna try it and I hope the result is good.
November 19, 2014 at 9:51 pm
These are awesome. I think imperfection looks more beautiful. Cant wait to do this with my daughter.
Gourmet Candy says
December 29, 2014 at 1:34 pm
I really liked the rock candy and you should also go to this site they got some pretty good candy here too http://www.myidolpops.com/
Heather says
October 24, 2015 at 8:02 pm
Well I am really glad I read this. I have been attempting to make rock candy for a baby shower. I have watched countless videos. Everyone makes it look so easy. For some reason the sugar I bought never seems to get clear. I stir and stir and stir. By the time it comes to a boil and I pour it into the jars within an hour its like a solid hard clump. I have three weeks to complete this task lol. I will not give up 😉
November 28, 2015 at 1:17 pm
I heard to dip skewers in the liquid solution and roll them in sugar before putting them in the jar. The sugar will crystallize on the other crystals.
Erica Watson says
January 12, 2016 at 12:39 am
I was wondering how did you make rock candy .now I know how to make it me and my grandkids can make that on family night
July 02, 2016 at 9:03 am
This is truly amazing!!!!!! The only thing I don't like is that it won't let me see the ingredients
July 02, 2016 at 9:04 am
This is truly amazing!!!!
kaidadraco says
February 14, 2017 at 2:05 pm
best thing ever! XD
Zareena says
April 09, 2017 at 10:27 pm
Hmm...i wonder if the sugar will stick on a heart shaped-wire? We can make a heart rock candy for Valentine's day! ??
April 19, 2017 at 2:55 pm
@Zareena Definitely worth a try! It wasn't the easiest to make, but maybe I'll try again soon since it's been many years since my first attempt 🙂
Shannon B says
July 02, 2021 at 11:02 am
Olivia Michaels says
August 29, 2021 at 11:44 am
Britney D McClenney says
November 27, 2021 at 1:39 pm
I was wondering if we could use Kool aid packets as the flavor and color for the rock candy?
November 27, 2021 at 5:12 pm
Hi Britney! I haven't tried this, but I do think it will work. The added sugar from Kool Aid should be fine and the color and flavor would work well!
Dorcas Berthold says
December 05, 2021 at 5:12 am
December 08, 2021 at 7:57 am
someone says
February 08, 2022 at 3:37 pm
Katrina says
February 11, 2022 at 10:46 pm
Karley says
March 20, 2022 at 5:28 pm
To redo it, it is per jar? Like do 1 jar at a time or do you add them all back in and then put the 1/4 cup of sugar?
March 24, 2022 at 10:16 pm
@Karley- It's per jar. If they're all the same color and flavor, you could do them all together, but still add 1/4 cup per jar. It seems like a lot, but the crystals need a lot to grow!
Allison says
May 26, 2022 at 1:41 pm
I tried this but the whole jar turned into wet but fairly solid granular sugar the first day - did I add too much sugar?! I was halving the recipe so maybe I messed up…
May 26, 2022 at 2:38 pm
Hi Allison! I haven't heard of this happening, but it could be that you used too much sugar and/or you didn't boil it long enough. Generally, if you "oversaturate" the solution with too much sugar, the extra sugar will just chill at the bottom of the jar as it cools, but if there was a lot of it, I could see how it could start hardening in the bottom of the jar and on the sides fairly quickly. Let me know if you try again!
May 31, 2022 at 7:31 pm
I did it exactly like the recipe said and I'm 4 days in and not one Crystal it hasn't done anything
June 02, 2022 at 11:38 am
Hi Erica! Unfortunately, rock candy can be VERY finicky and though I've made rock candy tons of times, I've even had issues with it before. There are SO many factors that can effect growth. It IS odd you didn't have any crystal growth at all, so I wonder if enough sugar was added and if it was dissolved into the water all the way. Sometimes rock candy doesn't grow perfectly on the stick or string, but with enough sugar properly dissolved, there should at least be SOME crystal growth in the jar. Let me know if it progressed at all or if you need any further help trouble shooting!
June 07, 2022 at 9:37 pm
August 20, 2022 at 2:43 pm
Hello! Science teacher here. Was planning to try this with my chemistry class but our classes are only 50 minutes long. Can I make the sugar solution early, like at home before school and bring it in and it still work? They are my 4th period class. Can I make at home then microwave to liven up the sugar before class?? Thanks for your help!
August 20, 2022 at 3:07 pm
Hi Cindy! With 50 minutes, I think you should have enough time to do the project in class... It may take 30-40 minutes to dissolve all the sugar into the water (but can be faster if you can get the water boiling before class starts!). Then it can just be poured into the prepared jars... it will take close to a week for rock candy to fully form, but will be fun to check in on every day to see the crystals forming! However, if you want to do it ahead of time, I think you could prepare the sugar saturated solution and then re-heat in class, but you may need to add a little more sugar when re-heating as sugar crystals may already be starting to form as it's cooled. But this should definitely work as I've re-used the solution leftover in jars to make more rock candy with no problem. Let me know how it goes!
December 22, 2022 at 11:31 am
Hi Sue, I use to work in a coffee shop and we kept flavored sugars. A vanilla bean in the sugar for vanilla, etc. I wonder if you couldn't flavor the sugar before hand instead of adding a concentrate to it. Norma
December 22, 2022 at 2:35 pm
Hi Norma- I think that's a great idea!
March 28, 2023 at 11:15 am
Loved the directions with pictures! Just wondering, if you could put two sticks in at once, on opposite sides of the jar?
March 28, 2023 at 12:09 pm
Hi KC! I haven't tried using 2 sticks at once, but as long as your jars are wide mouth jars, you should be able to do this!
Marlene Pollitt says
May 10, 2023 at 10:53 pm
Melissa E says
June 07, 2023 at 5:39 pm
June 09, 2023 at 12:39 pm
Hi Melissa! Yes, I use pint jars for my rock candy. How much extract you use will depend on how strong you like the flavor, but I'd say a teaspoon should work. You shouldn't need to ad more sugar for that small amount of extract. If you ad the extract in while the mixture is still boiling, it will burn the alcohol off. And how much food coloring really depends on the type you're using- I recommend using a concentrated food coloring and you'll only need a few drops. I hope that's helpful!!
Brenda says
June 09, 2023 at 6:27 pm
Hello, I made my first batch and they turned out wonderful. Second batch, not so much. Third batch, well, what I got was sugar slushies and big clumps of sugar stuck to the bottom of the jars. Obviously I’m an idiot. What can I do to save my starter if I can save it? I need help. That’s a lot of sugar to just discard.
June 11, 2023 at 4:28 pm
Hi Brenda- Yes, I have some advice on this in my post! You can even re-use the solution if your rock candy grows. Just pour it back into a saucepan and bring to a boil- you will want to add some more sugar. Let me know how it goes!
November 17, 2023 at 10:24 pm
Would it be ok to cover the jar with aluminum foil, to keep dust from getting inside? Or do they need to be left open so water can evaporate? I wouldn't be pressing the foil around the sides tightly, just kinda loosely covering it. Our house became super dusty all of a sudden after my brother moved in & nothing seems to help keep it at bay🤢 I like the idea of reusing the left over solution after the first sticks are finished, but without covering the jars I'd feel too disgusted to do so.
BTW, here's a tip to get bigger crystals... Supposedly the slower the solution cools, the bigger the crystals will turn out... So maybe it'd be helpful to wrap the jars in foil or use a thermos type container to make the candies in? Only prob with the thermos-you couldn't see the progress until you removed the stick. I'm sure you guys can come up with plenty of ways to try and slow down the cooling process. It actually makes sense that the quicker the solution cools the smaller the crystals would be, since "heat" is just a term for how fast particles are moving.
November 18, 2023 at 12:05 am
Hi Heather- Yes! As long as you're not totally sealing the foil around the jars, I think it would be perfectly fine to loosely cover them. Just make sure some air can still circulate.
And yes, I bet wrapping the jars in foil or towels could help slow the cooling down a bit- great idea!!
Kendyl says
January 12, 2024 at 3:49 pm
January 20, 2024 at 6:41 pm
January 21, 2024 at 9:20 pm
Hi Kat- I'm really sorry to hear that! Like I mention, making rock candy is an extremely finicky process and many factors can determine the outcome. Generally if your whole jar crystalizes, this is due to the jar being moved or disturbed too much or from temperature fluctuations after your solution is in the jar (like if the room is warm during the day and then the temperature drops at night). It can also happen if some sort of debris getting into the jar. All of the same factors can create "cotton candy" or "fluffy" looking candy, so I am thinking one of those things may have created the issues. I hope that's helpful! I know it's frustrating when experiments don't work after spending so much time on them (and rock candy takes SO much time), but I hope you'll try again at some point because lots of people have had success with this "recipe!"
February 25, 2024 at 5:38 pm
April 09, 2024 at 4:39 pm
April 10, 2024 at 10:07 pm
Hi Tes! I haven't tried doing more than 1 in a jar, but I think as long as your jars are large enough (I recommend wide mouth jars), you should be able to do this. Just make sure there is enough space in between the sticks for rock candy to grow. Let me know how it goes!
April 11, 2024 at 7:17 pm
April 17, 2024 at 9:38 am
Hi Heather- Yes, you should be able to do this with fewer jars/sticks!
May 20, 2024 at 5:22 pm
If i were to take a rock candy out and put it into a different dye solution would it continue to grow fine so that i get a multi colored rock candy?
May 23, 2024 at 11:51 am
Hi Luke- I haven't tried this, but I do think it should work!
July 29, 2024 at 10:26 pm
I remember trying to make rock candy as a kid. All I remember is it didn't turn out well. lol I tried making this around a yr ago and was so excited that my turned out looking exactly like the ones you buy at the store😃 It took quite a bit longer than a week for enough crystals to form to get to that point tho. I was planning on using the left over syrup to make more, but my idiot brother knocked over the jar, spilling it everywhere! You def don't want that to happen! obv it was an awful sticky mess to clean up!
Leave a Reply
Your email address will not be published. Required fields are marked *
Rate This Recipe
Rock Candy Experiment for Kids- The Fastest Way to Make Rock Candy!
Categories Science Experiments
One of the best crystal experiments to try with kids is the rock candy experiment for kids ! It’s edible, fun and takes just 2 main ingredients.
My kids love making all kinds of crystals, and this time, we wanted to experiment with making an edible crystal.
The kids had a blast making the rock candy- and eating it was fun, too!

Fast Rock Candy Crystal Experiment for Kids
Follow along with these directions to do the rock candy science experiment and learn how to make rock candy fast!
What is the Fastest Way to Make Rock Candy?
Rock candy can take weeks to make. Sugar crystals are some of the slowest crystals to form. However, there is a way to speed up the process.
Using an extra super-saturated solution and heating the sugar to just below the soft candy stage will produce rock candy in a fraction of the time- in just 1-2 days!
Making rock candy is one of our favorite classic science fair projects !
What Do I Need to Make Rock Candy Crystals?
Shop these Amazon affiliate links to make sure you have everything you need to do the rock candy experiment!
What You Need for a Science Fair
You’ll want to have these supplies on hand before doing your science fair project. Shop the included Amazon storefronts to make things easier and don’t forget to download the free science fair planning checklist before getting started!

Science Fair Project Planning
When you’re planning your project, you want to keep everything organized. Click the image below to get my free science fair project checklist so you can start organizing your project from the start.
You may also want to check out this list of science fair project research supplies.
Supplies for a Science Fair Project
There are so many supplies for science fair projects that are individual to each project, but if you want a general list of possible supplies and inspiration for your project, check out my selection of science fair experiment supplies on Amazon.
Supplies for a Science Fair Presentation
Your science fair presentation is important! It should look presentable and eye-catching. Check out this list of my favorite science fair presentation supplies.
Rock Candy Experiment Worksheet
This rock candy experiment was first released as part of the Jarring Science Club. Join the Jarring Science Club and get access to the rock candy experiment worksheets as well as a complete lesson guide, quizzes, exclusive video content, and more!
Plus, club members get access to 100s of other science experiment worksheets and lessons that make science lesson planning a breeze! Join now and get the rock candy experiment lesson plan!

How to Do the Rock Candy Experiment for Kids
What is the fastest way to make rock candy? Find out in this rock candy experiment for kids! Make edible rock crystals in record time!
Make seed crystals by dipping your coffee stirrers into water and then dipping them into sugar. Let these completely dry before you add the sugar solution.
Heat 4 cups of water and 8 cups of sugar on the stove. Add the sugar in one cup at a time and stir until completely dissolved. By the end, your sugar will make a mountain before dissolving.

Boil the sugar the whole time you’re adding new sugar. When all the sugar is dissolved, take the sugar solution off the stove.
Pour the sugar solution into jars. Add desired food coloring to each jar and stir.
Suspend the sugared coffee stirrers in the middle of the sugar solution with a clothespin. Lay the clothespin across the top of the jars to hold the coffee stirrers in place.
This will help encourage the sugar to grow on the sticks and not on the bottom of the jar.

Wait 24-48 hours for the sugar crystals to form on the sticks. A couple of times a day, move the sticks up and down vertically so that they don’t stick to the bottom of the jar and to break up any crust that forms on the surface of the sugar solution.
When the crystals have formed, remove them from the jar and set on a paper towel to dry.

Once the sugar is dry, inspect it to see what sugar crystals look like. You can also taste it, too!
The reason these sugar crystals form faster than some recipes is because we made a supersatrated solution with sugar. This speeds up the time it takes the crystals to form.
More Crystal Experiments
Edible Sugar Crystal Science Experiment for Kids
Growing Crystals with Bluing and Ammonia- Complete Science Lesson!
Borax Crystals Science Project
Borax free crystals
Share this project with a friend!
Make Your Own Sugar Crystals for Rock Candy
- Activities for Kids
- Chemical Laws
- Periodic Table
- Projects & Experiments
- Scientific Method
- Biochemistry
- Physical Chemistry
- Medical Chemistry
- Chemistry In Everyday Life
- Famous Chemists
- Abbreviations & Acronyms
- Weather & Climate
- Ph.D., Biomedical Sciences, University of Tennessee at Knoxville
- B.A., Physics and Mathematics, Hastings College
It's easy to grow your own sugar crystals, which are also known as rock candy because the crystallized sucrose, also known as table sugar, resembles rock crystals and you can eat your finished product. You can grow clear, beautiful sugar crystals with sugar and water or you can add food coloring to get colored crystals. It's simple, safe, and fun. Boiling water is required to dissolve the sugar, so adult supervision is recommended for this project.
Difficulty: Easy
Time Required: A few days to a week
Rock Candy Ingredients
- 1 cup water
- 3 cups table sugar (sucrose)
- clean glass jar
- pencil or butter knife
- pan or bowl for boiling water and making the solution
- spoon or stirring rod
How to Grow Rock Candy
- Gather your materials.
- You might want to grow a seed crystal, a small crystal to weight your string and provide a surface for larger crystals to grow on. A seed crystal isn't necessary as long as you're using a rough string or yarn.
- Tie the string to a pencil or butter knife. If you have made a seed crystal, tie it to the bottom of the string. Set the pencil or knife across the top of the glass jar and make sure that the string will hang into the jar without touching its sides or bottom. However, you want the string to hang nearly to the bottom. Adjust the length of the string, if necessary.
- Boil the water. If you boil your water in the microwave, be very careful removing it to avoid getting splashed.
- Stir in the sugar, a teaspoonful at a time. Keep adding sugar until it starts to accumulate at the bottom of the container and won't dissolve even with more stirring. This means your sugar solution is saturated. If you don't use a saturated solution , then your crystals won't grow quickly. On the other hand, if you add too much sugar, new crystals will grow on the undissolved sugar and not on your string.
- If you want colored crystals, stir in a few drops of food coloring.
- Pour your solution into the clear glass jar. If you have undissolved sugar at the bottom of your container, avoid getting it in the jar.
- Place the pencil over the jar and allow the string to dangle into the liquid.
- Set the jar where it can remain undisturbed. If you like, you can set a coffee filter or paper towel over the jar to prevent dust from falling into the jar.
- Check on your crystals after a day. You should be able to see the beginnings of crystal growth on the string or seed crystal.
- Let the crystals grow until they have reached the desired size or have stopped growing. At this point, you can pull out the string and allow the crystals to dry. You can eat them or keep them.
- Crystals will form on a cotton or wool string or yarn, but not on a nylon line. If you use a nylon line, tie a seed crystal to it to stimulate crystal growth.
- If you're making the crystals to eat, don't use a fishing weight to hold your string down. The toxic lead from the weight will end up in the water. Paper clips are a better choice, but still not great.
- Kitchen Science Experiments for Kids
- Science Experiments and Activities for Preschoolers
- Science Projects Photo Gallery
- How to Flavor Rock Candy
- Top Chemistry Projects for Bored Kids
- Baking Soda Science Projects
- Mad Scientist Party Theme
- Magic Rocks - Review
- Safe Science Experiments
- Easy Science Projects
- Crystal Frost Window Paint
- How to Make a Mentos & Diet Soda Chemical Volcano Eruption
- How to Make Floam
- Cut Flower Preservative Recipes
- Stink Bomb Recipes
- Make Mood Ring Color Change Slime
- PRO Courses Guides New Tech Help Pro Expert Videos About wikiHow Pro Upgrade Sign In
- EDIT Edit this Article
- EXPLORE Tech Help Pro About Us Random Article Quizzes Request a New Article Community Dashboard This Or That Game Happiness Hub Popular Categories Arts and Entertainment Artwork Books Movies Computers and Electronics Computers Phone Skills Technology Hacks Health Men's Health Mental Health Women's Health Relationships Dating Love Relationship Issues Hobbies and Crafts Crafts Drawing Games Education & Communication Communication Skills Personal Development Studying Personal Care and Style Fashion Hair Care Personal Hygiene Youth Personal Care School Stuff Dating All Categories Arts and Entertainment Finance and Business Home and Garden Relationship Quizzes Cars & Other Vehicles Food and Entertaining Personal Care and Style Sports and Fitness Computers and Electronics Health Pets and Animals Travel Education & Communication Hobbies and Crafts Philosophy and Religion Work World Family Life Holidays and Traditions Relationships Youth
- Browse Articles
- Learn Something New
- Quizzes Hot
- Happiness Hub
- This Or That Game
- Train Your Brain
- Explore More
- Support wikiHow
- About wikiHow
- Log in / Sign up
- Food and Entertaining
- Chocolate and Candy
- Sugar Treats
How to Make Rock Candy
Last Updated: July 17, 2024 References
This article was reviewed by Marrow Private Chefs . Marrow Private Chefs are based in Santa Rosa Beach, Florida. It is a chefs’ collective comprised of an ever-growing number of chefs and culinary professionals. Though regionally influenced primarily by coastal, traditional southern, cajun, and creole styles and flavors, the chefs at Marrow have a solid background in all types of cuisine with over 75 years of combined cooking experience. There are 7 references cited in this article, which can be found at the bottom of the page. This article has been viewed 1,768,383 times.
Rock candy makes for a delicious science experiment you can do in your own kitchen. Rock candy can form on a wooden stick or a string and you can add colors and flavors to customize your candy in any way you can imagine!
Ingredients
- 2 cups (473 ml) of water
- 4 cups (946 g) of granulated white sugar
- Food coloring (optional)
- Flavoring (optional)
Making the Sugar Solution

- If you don't have access to a stove, you can use a microwave instead. Combine the sugar and water in a microwave-safe glass and heat it for two minutes on high. Stir the sugar water and microwave for another 2 minutes. Stir the mixture a third time and the sugar should dissolve almost entirely into the water.
- Use purified water if possible. The sugar can attach to impurities in the tap water and create a crust that will prevent water from evaporating and prevent the crystals from growing on your string instead. [2] X Research source
- Make sure you handle the pot or microwave-safe glass with hot pads or oven mitts so you don't burn yourself.
- Stir the solution until the water is clear. If the solution is cloudy or you find the sugar stops dissolving, turn the heat up so the water reaches a vigorous boil. [3] X Research source Hot water has a higher saturation point than cool water, so turning up the heat should allow you to mix in the rest of the sugar.

- If you have undissolved sugar that didn't mix with the boiling water, you may want to pour the solution through a strainer and only retain the liquid.
- The solution you have made is a super-saturated solution, meaning the water has absorbed more sugar than it would have absorbed at room temperature. As the solution cools, the water saturation point of the water will become lower, and it will no longer be able to hold the amount of sugar. The dissolved sugar will be unable to stay in liquid form, and will instead crystallize on the string or stick you provide. [5] X Research source
- You only need a few drops of flavoring, but try to make the solution dark with color for the best results. [7] X Research source
- Try mixing in drink mix, like Kool-Aid, for color and flavor.
- Try adding a splash of fruit juice for lemon, lime, orange, or other fruity flavored candy.
- Try different extracts like peppermint, strawberry, vanilla, or even banana.
- Make sure the glass is clean and contains no dust particles. Even dust can give the sugar crystals something to cling to, and you only want them to settle and grow on your string or stick. [8] X Research source
- Cover the glass with a piece of wax or parchment paper to prevent dust from settling on the top of the solution. [9] X Research source
- This recipe, since it uses only one large jar of glass, yields one candy. If you want to make multiple small candies or do not have a large jar, you can divide the solution into smaller jars. The yield would then be as many as your jars.
Making Rock Candy on a String
- Use a string made from natural fiber, like twine or cotton. Fishing twine or nylon string are too smooth and it will be difficult for the sugar crystals to find crevices to cling to and grow. [11] X Research source
- You can also use a washer or screw to weight the string, or even another piece of rock candy, which may help your crystals grow faster. [12] X Research source
- The pencil should be long enough that it can rest on the top of the glass without falling in. You can also use a butter knife, skewer, or popsicle stick instead. A butter knife or popsicle stick may be more stable, as they can lay flat on top of the glass and won't roll.
- You must make sure the string is completely dry before you proceed to the next step and be very careful not to knock off any of the seed crystals when you place the string in the solution. [14] X Research source
- You can skip this step or try to speed it along by wetting the string and rolling it in granulated sugar (just make sure the string is completely dry before you put it in the glass and the sugar isn't falling off), but making seed crystals will make your rock candy grow faster and increase your chances of success in growing crystals. [15] X Research source
- As the water evaporates, the remaining solution becomes more saturated with sugar, and the water must force the sugar out. The sugar molecules will collect on the string, forming your rock candy crystals. [16] X Research source
- Tape the pencil to the jar to keep it from rolling or moving while your crystals form.

- If you want to grow crystals quickly, but don't care if they get big, put the glass in a sunny spot so that the water evaporates quickly. [18] X Research source
- Vibrations can negatively affect your crystal growth. Keep your glass off the ground (and away form the vibrations of people walking on the floor) and away from sources of music or noise, like a stereo or television. [19] X Research source

- If the rock candy is stuck to the glass, run some hot water on the bottom of the glass. This should loosen the sugar enough so that you can pull your candy out without damaging it. [21] X Research source
Making Rock Candy on a Stick
- Allow the skewers to dry completely before proceeding to the next step. If the sugar isn't firmly stuck to the wood, it may fall off in the glass and the crystallization will occur on the sugar on the bottom of the glass and not on your skewer. [23] X Research source

- Try to keep the tip of the skewer about 1 inch (2.5 cm) from the bottom of the glass. [25] X Research source
- Your skewer should be held securely by the clothespin and still be in the very center of the glass.
- Cover the glass with a paper towel. You can tear a little hole for the skewer to poke through the towel.

- If there is a crust on top of the surface of the water, use a butter knife to gently break through the crystals, avoiding the crystals near your skewer. [29] X Research source
- If the rock candy is stuck to the glass, run some hot water on the bottom of the glass. This should loosen the sugar enough so that you can pull your candy out safely without damaging it. [30] X Research source

Community Q&A
- This recipe may take longer than expected so patience may be needed. Thanks Helpful 16 Not Helpful 2
- If you do not see any crystals growing on the string after a day or so, remove the pencil and string, boil the water again, and try to mix in more sugar. If more sugar does mix in, you did not add enough when you were mixing in the sugar at the beginning. You can start again with the now fully-saturated solution. Thanks Helpful 9 Not Helpful 2
- When making rock candy in the microwave, make sure you watch it. If it starts boiling, your syrup is most likely burned. Thanks Helpful 13 Not Helpful 5
Tips from our Readers
- For smaller batches, shot glasses, toothpicks, chopsticks, bamboo skewers halved, and clothes pins. The smaller batches grew crystals faster in our experiment. Great for younger participants.
- Do ombré rock crystal candy by preparing the mixture as shown, let it grow halfway, then prepare another mixture with a different color
- If you want tiny granules, take the candy off the string or stick, and bash it inside a bag with a rolling pin.
- You can add flavorings so the rock candy does not just taste like caramel.
- Make sure you wash the string before you use it and dry it with a towel.
- For the holidays, use peppermint flavor and red and green coloring.
- Kids love rock candy when you use pink lemonade flavoring!

- Do not mess with the jar or put your fingers in it. This disrupts the forming process of the crystalline structure. It may not prevent it from working, but it will hinder the progress of the crystal growth. Thanks Helpful 6 Not Helpful 3
Things You'll Need
Sugar solution.
- Pot or saucepan
- Wooden spoon
Rock Candy on a String
- Popsicle stick, wooden skewer, butter knife or pencil
- Paper clip or washer
- Tall, narrow jar or glass (not plastic)
Rock Candy on a Stick
- Skewer or popsicle stick
- Clothes pin
You Might Also Like

- ↑ https://www.exploratorium.edu/cooking/candy/recipe-rockcandy.html#
- ↑ http://sciencenotes.org/solutions-to-common-crystal-growing-problems/
- ↑ http://www.sciencebuddies.org/science-fair-projects/phpBB3/viewtopic.php?f=24&t=4511
- ↑ https://sciencebob.com/make-your-own-rock-candy/
- ↑ http://sciencenotes.org/grow-table-salt-or-sodium-chloride-crystals/
- ↑ https://www.youtube.com/watch?v=HvKJz4M585c
- Videos provided by Todd's Kitchen
About This Article

To make rock candy, first wet a wooden skewer and roll it in granulated sugar. Set the skewer aside to dry. Then, bring 1 cup (240 mL) of water to a boil over medium heat. Gradually stir in 2 cups of granulated sugar until all of the sugar dissolves, then remove the pan from the heat. Add 1 tablespoon (15 mL) of food coloring, as well as ½ teaspoon (2 ½ mL) of candy oil, also know as flavoring oil. Let the mixture cool for 10 minutes, then pour it into a clean jar. Now, pinch a clothespin over the end of the sugar-coated skewer, and insert the skewer into the jar so the clothespin is resting across the top. Cover the top of the jar loosely with plastic wrap, and set it aside for 3 to 5 days. Once the rock candy has reached the size you want, remove it from the jar and place it in a new, empty jar to dry. If you want to learn more, like how to attach your rock candy to a stick, keep reading the article! Did this summary help you? Yes No
- Send fan mail to authors
Reader Success Stories
Katherine Fentzlaff
Apr 26, 2016
Did this article help you?

Mar 4, 2017
Rayven McKenzie
Oct 21, 2016
Keshan Mary
May 23, 2017
Jun 22, 2018

Featured Articles

Trending Articles

Watch Articles

- Terms of Use
- Privacy Policy
- Do Not Sell or Share My Info
- Not Selling Info
Don’t miss out! Sign up for
wikiHow’s newsletter
Science Bob
- Experiments
- Science Fair Ideas
- Science Q&A
- Research Help
- Experiment Blog
more in 10-12 years
Make your own rock candy, this experiment requires adult help it deals with very hot liquids be smart and be safe – only do this with adult help., you will need.
- A wooden skewer (you can also use a clean wooden chopstick)
- A clothespin
- 1 cup of water
- 2-3 cups of sugar
- A tall narrow glass or jar
- Clip the wooden skewer into the clothespin so that it hangs down inside the glass and is about 1 inch (2.5 cm) from the bottom of the glass. (as shown)
- Remove the skewer and clothespin and put them aside for now.
- Get a helpful adult!
- Pour the water into a pan and bring it to boil.
- Pour about 1/4 cup of sugar into the boiling water, stirring until it dissolves.

- Have your friendly ADULT carefully pour the sugar solution into the jar almost to the top. Then submerge the skewer back into the glass making sure that it is hanging straight down the middle without touching the sides.
- Allow the jar to fully cool and put it someplace where it will not be disturbed.
- Now just wait. The sugar crystals will grow over the next 3-7 days.
Want colored rock candy? Add food coloring to your sugar water and make sure sure that it is pretty dark in color for the best result.
How does it work?
When you mixed the water and sugar you made a SUPER SATURATED SOLUTION. This means that the water could only hold the sugar if both were very hot. As the water cools the sugar “comes out” of the solution back into sugar crystals on your skewer. The skewer (and sometimes the glass itself) act as a “seed” that the sugar crystals start to grow on. With some luck and patience you will have a tasty scientific treat! Enjoy!
More Images & Video

More from my site

ADS (these ads support our free website)
Share this page.
| |||||||||||||||||||||||||||||||||||||||||||||||


:max_bytes(150000):strip_icc():format(webp)/sweet-book-of-candy-making300-58adfdc05f9b58a3c903b6dd.jpg "rock candy crystal experiment")
IMAGES
COMMENTS
Rock candy is a collection of large sugar crystals that are "grown" from a sugar-water solution. Sugar, like many other materials, can come in many different physical states. As a solid, it can either be amorphous, without shape, like when it forms cotton candy, or crystalline, with a highly ordered structure and shape, like when it forms rock ...
When the experiment is all set up, your rock candy growing jars should look like the one pictured here. ... Briefly rinse the rock candy crystals in cold water, then leave them on a paper towel for 30 minutes to dry. Using a ruler, measure the length of the rock candy, and the width at the widest point. Record your measurements in a data table ...
Check out other crystal science projects like our salt crystals and borax crystals. You can also make edible rock candy geodes. This sugar crystal experiment uses the same saturation principles and makes a saturated solution to form the crystals. Growing crystals is fun for kids and teaches them about solutions, molecular bonds, patterns, and ...
Grow Sugar Crystals. The procedure is really easy. Dissolve the sugar in the boiling water. Heat the sugar solution on the stove, or in the microwave if you have trouble getting the sugar to dissolve. Once the sugar dissolves, remove it from heat. If you keep heating it, it hardens and burns.
In this fun and easy crystal science experiment, we're going to grow rock candy crystals. Note: Since hot water in involved, please insure adult supervision is utilized. Materials: Sugar Water Measuring cups Clean glass jar Butter knife or popsicle stick Rough string or yarn Microwave safe container Spoon Wax paper Food coloring Instructions: Tie a piece of the string to the center of the ...
Anchor it to the top of the container somehow. We used a string and a paperclip. Make sure the string isn't touching the sides of the jar or the bottom of the jar. Put your sugar-water solution somewhere safe to sit for a few days. Watch and wait for your sugar crystals to grow. These are your rock candy crystals.
The Science Behind The Rock Candy Crystals: When you make the sugar syrup for the rock candy, you are making a supersaturated solution. This means there is more sugar in it than can actually stay in there. It is unstable. As the temperature decreases, the sugar comes out of the solution. This sugar forms into crystals.
Fold the paper towel in two and, using scissors, make a small cut in the center to put the chopstick through. 11. Wait. Growing rock candy is a slow process. You'll start to see some crystals by ...
Rock Candy Making Tutorial: To begin, prep the candy sticks. Soak the sticks in water and roll them in a coating of granulated white sugar to "seed" the rock candy crystals (give them a starting point to grow from). Allow the sugared sticks to dry completely (for at least 30 minutes). If desired, use a fine-mist spray bottle to lightly mist ...
Homemade Rock Candy Experiment. Ingredients. 2 cups water. 6 cups granulated sugar. Optional: 1/2 to 1 teaspoon flavoring extract or oil - feel free to get creative! Optional: food coloring - to give your candy a fun color. Equipment. 4 12-ounce jars or one quart-sized jar. Cotton thread & pencils or 4 wooden skewers.
Remove the sugar-water from the heat and allow it to cool. Preparing the Candy Sticks. Cut the skewers to a desirable size for the jar (s) that you are using. Then, dip the sticks in water and roll them in sugar. Set the sugar-coated sticks aside and allow them to dry. Prepping the Jars.
Heat the water in a pan and add the sugar slowly, stirring continuously. Keep adding sugar until no more will dissolve, and then remove the heat and leave to cool for about 5 minutes. If you can get a bit more sugar to dissolve, then that's a good thing. You want a saturated solution.
Here's what you need: Granulated Sugar (for 5 sticks of candy, you'll need 10 cups) Water. Food coloring (if you want to add color to your candy) Mason jars or other receptacles to hold sugar solution. I recommend a standard 16 oz. mason jar. Skewers or sticks to make rock candy on. I use a simple wooden kabob skewer.
Find out in this rock candy experiment for kids! Make edible rock crystals in record time! Make seed crystals by dipping your coffee stirrers into water and then dipping them into sugar. Let these completely dry before you add the sugar solution. Heat 4 cups of water and 8 cups of sugar on the stove. Add the sugar in one cup at a time and stir ...
Adjust the length of the string, if necessary. Boil the water. If you boil your water in the microwave, be very careful removing it to avoid getting splashed. Stir in the sugar, a teaspoonful at a time. Keep adding sugar until it starts to accumulate at the bottom of the container and won't dissolve even with more stirring.
2. Stir in the 4 cups (946 g) of sugar in 1/2 cup (118 g) increments. Stir with a spoon after each addition until the sugar is dissolved into the water. As the water becomes more saturated with sugar, it will take longer for it to dissolve in the water. It may take as long as two minutes for the sugar to dissolve.
Rock Candy on a Stick is easy to make and a fun experiment for the kids! This Homemade Rock Candy will develop large sugar crystals over a 7 day period and will make the perfect sweet treat for your little helpers afterward. ... Rock candy crystals may be small if the sugar solution is not supersaturated with sugar. You want to make sure that ...
Heat the water in the saucepan over medium-high heat until it comes to a boil. 2. Completely dissolve the sugar in the boiling water, stirring continuously with the wooden spoon until the solution grows clear and it reaches a rolling boil. 3. Remove the solution from the heat, and then carefully pour it into the jar.
Remove the skewer and clothespin and put them aside for now. Get a helpful adult! Pour the water into a pan and bring it to boil. Pour about 1/4 cup of sugar into the boiling water, stirring until it dissolves. Keep adding more and more sugar, each time stirring it until it dissolves, until no more will dissolve.
Cut a wooden skewer to about 7 inches long. Spray half of the skewer with water. (You can also dunk it in a glass of water or put it under the tap.) Sprinkle sugar over the wet part, rotating the skewer to cover it. Adding sugar to the skewers gives seed crystals for your rock candy to grow on.
As the water evaporates, the solution becomes more saturated and sugar molecules will continue to come out of the solution and collect on the seed crystals on the string. The rock candy crystals grow molecule by molecule. Your finished rock candy will be made up of about a quadrillion (1,000,000,000,000,000) molecules attached to the string .
How to Make Rock Candy: 2 cups sugar. 1 cup water. thin wooden skewer stick and clothespin. pint size jar. food coloring (optional) We used the amounts above in each of our jars so you may need to double, triple, etc depending on how many you are doing. Boil the water and slowly add the sugar until it all dissolves, this takes awhile.
Fill the jars with hot, soapy water and place them in a pan with about 3 inches of water. Boil the water for 10 minutes (for safety, watch it carefully as you would when canning), then turn off the heat. Let the jars cool to the touch and use a fork to break up the sugar crystals.